

Hello, baking enthusiasts! Chef Andrew here.
Let’s talk about that beautiful, delicious moment of indecision. You’re staring into the pantry, a craving hits, and the ultimate question arises: “Do I want a rich, fudgy brownie or a chewy, golden chocolate chip cookie?”
Table of Contents
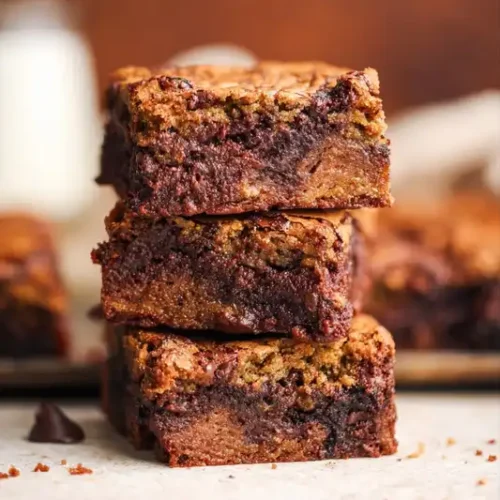
For years, we’ve been forced to choose. But I’m here to tell you that you can have it all in one perfect, decadent square. I’m talking, of course, about the brookie. But not just any brookie. Today, we are elevating this magnificent hybrid to legendary status.
How? With one game-changing ingredient and a technique that guarantees perfection. Get ready to create the most irresistible brown butter brookies you’ve ever tasted.
So, what’s the #1 secret? It’s not just one thing. The secret is a three-part masterpiece: the nutty, toasted magic of brown butter infused into both batters; the perfect balance of two distinct, high-quality batters; and a simple 7-step process that makes this seemingly complex bake completely achievable.
This isn’t just a recipe; it’s the end of dessert indecision forever.
The #1 Secret to Irresistible Brown Butter Brookies (In 7 Steps)
Equipment
- 9×9 inch square pan
- Saucepan
- Mixing bowls
- Parchment paper
Ingredients
Cookie Dough Batter
- 10 tbsp unsalted butter (140g)
- 1/2 cup packed light or dark brown sugar (100g)
- 1/4 cup granulated sugar (50g)
- 1 large egg
- 1 egg yolk
- 1 tsp vanilla bean paste or vanilla extract
- 1 tsp instant coffee + 1 tsp water dissolved
- 1 1/4 cup all purpose flour (163g)
- 3/4 tsp salt
- 1/2 tsp baking powder
- 1/4 tsp baking soda
- 6 oz chopped chocolate mix of milk and dark recommended (170g)
Brownie Batter
- 10 tbsp unsalted butter (140g)
- 4 oz high quality dark chocolate 60-70% cocoa, chopped (113g)
- 1 tsp instant coffee mixed with 1 tablespoon hot water
- 1/3 cup cocoa powder Dutch processed preferred (35g)
- 2 large eggs room temperature
- 1 cup granulated sugar (200g)
- 1/2 cup all purpose flour (65g)
- 3/4 tsp salt
- 3 oz chopped chocolate milk and dark combined (85g)
Instructions
- Make the Cookie Dough Batter: In a saucepan, brown 10 tbsp of butter. Turn heat to low, whisk in sugars for 1-2 minutes. Remove from heat, cool for 5 minutes. Whisk in egg, egg yolk, vanilla, and dissolved coffee until creamy. In a separate bowl, mix flour, salt, baking powder, baking soda, and chopped chocolate. Fold dry ingredients into wet ingredients until just combined. Do not overmix. Set aside.
- Make the Brownie Batter: Preheat oven to 350°F (175°C) and line a 9×9 pan with parchment paper. Brown the other 10 tbsp of butter. Pour the hot butter over the 4 oz of chopped chocolate in a heatproof bowl. Let sit for 2-3 minutes, then stir until smooth. Whisk in the dissolved coffee and sifted cocoa powder.
- Combine Brownie Batter: In a large bowl, whisk eggs and sugar for 2-3 minutes until pale and fluffy. Pour the warm chocolate mixture into the eggs and whisk to combine. Sift in the flour and salt, folding gently. Finally, fold in the remaining 3 oz of chopped chocolate.
- Assemble the Brookies: Spread about ⅓ of the brownie batter on the bottom of the prepared pan. Dollop chunks of the cookie dough on top, leaving gaps. Spoon the remaining brownie batter into the gaps. Place any remaining cookie dough on top for a patchwork effect. Gently flatten with a spatula.
- Bake: Bake for 32-35 minutes. The edges should be set, but a toothpick in the center should come out with moist, sticky crumbs (not wet batter). It’s better to underbake than overbake.
- Cool and Serve: Let the brookies cool completely in the pan for at least 30 minutes, or up to 2 hours for the best texture. Use the parchment handles to lift them out, then cut with a sharp knife. Enjoy!
Notes
Chef’s Pro-Tips
- Don’t Overmix: For both batters, fold until just combined to ensure a tender, fudgy texture.
- The Toothpick Test: Aim for moist, sticky crumbs for the gooiest center. A clean toothpick means they might be overbaked.
- Patience is Key: Letting the brookies cool completely is essential for them to set properly and for clean cuts.
More Favorites from My Kitchen:
Never Suffer a Soggy Peach Crisp Again: The #1 Fail-Proof Recipe
7 Common Mistakes to Avoid When Making Cherry Cobbler
Or go to my Pinterest.
Why These Brown Butter Brookies Are a Cut Above
This recipe is all about depth of flavor and texture. We aren’t just mixing things in a bowl; we are building layers of deliciousness.
- Brown Butter is a Flavor Revolution: If you’re still using plain melted butter in your baking, you are missing out on a world of flavor. Browning butter cooks the milk solids, creating a deep, nutty, and toasted aroma that adds an incredible complexity to both the cookie and brownie layers. It’s the difference between good and unforgettable.
- Two Batters, One Perfect Harmony: We create a genuine chewy chocolate chip cookie dough and a separate, intensely fudgy brownie batter. This ensures you get that distinct textural contrast in every single bite—not a muddy, uniform cake.
- The 7-Step Method to Success: From browning the butter to the final, torturous cooling period, I’ve broken down this recipe into seven clear, manageable steps. This roadmap eliminates guesswork and ensures you get that gooey center, crackly top, and perfectly defined layers. Following these steps is key to mastering brown butter brookies.
Ready? Let’s Bake! The 7 Steps to Perfection
Follow this guide, and you’ll be pulling a pan of bakery-quality brown butter brookies out of your oven.
Yields: 16 brookies
Prep time: 30 minutes
Cook time: 35 minutes
The Ingredients You’ll Need for Brown Butter Brookies
Having everything ready to go (your mise en place) makes the process smooth and enjoyable.
For the Brown Butter Cookie Dough Batter:
- 10 tbsp unsalted butter (140g)
- ½ cup packed light or dark brown sugar (100g)
- ¼ cup granulated sugar (50g)
- 1 large egg
- 1 egg yolk (for extra richness and chew)
- 1 tsp vanilla bean paste (or vanilla extract)
- 1 tsp instant coffee + 1 tsp water (dissolved)
- 1 ¼ cup all-purpose flour (163g)
- ¾ tsp salt
- ½ tsp baking powder
- ¼ tsp baking soda
- 6 oz chopped chocolate (170g), a mix of milk and dark is fantastic
For the Fudgy Brownie Batter:
- 10 tbsp unsalted butter (140g)
- 4 oz high-quality dark chocolate (113g), 60-70% cocoa
- 1 tsp instant coffee + 1 tbsp hot water (dissolved)
- ⅓ cup Dutch-processed cocoa powder (35g)
- 2 large eggs, at room temperature
- 1 cup granulated sugar (200g)
- ½ cup all-purpose flour (65g)
- ¾ tsp salt
- 3 oz chopped chocolate (85g)
The 7 Steps to Irresistible Brown Butter Brookies
Step 1: The Flavor Foundation (Browning the Butter)
- For the Cookie Dough: Place 10 tbsp of butter in a light-colored saucepan over medium-low heat. Let it melt, then continue to cook, swirling occasionally. It will foam, then subside. Watch for small, amber-colored bits to form at the bottom and a nutty aroma to fill your kitchen. This is liquid gold! Immediately move on to the next step.
Step 2: Building the Cookie Dough Batter
- Turn the heat to the lowest setting. Add the brown and white sugars to the hot brown butter and whisk for 1-2 minutes on the heat. Remove from the stove and let it cool for 5 minutes—it should be warm, not hot.
- Whisk in the egg and egg yolk, followed by the vanilla and dissolved coffee. Whisk vigorously for a minute until the mixture is smooth and creamy, like caramel.
- In a separate bowl, sift the flour, salt, baking powder, and baking soda. Add the chopped chocolate and toss.
- Add the dry ingredients to the wet ingredients in two batches, folding gently with a spatula until just combined. Do not overmix! Set this beautiful batter aside.
Step 3: Crafting the Fudgy Brownie Batter
- Preheat your oven to 350°F (175°C) and line a 9×9 inch square pan with parchment paper, leaving an overhang on the sides to use as handles.
- In the same saucepan (no need to wash!), brown the other 10 tbsp of butter just as you did before.
- Place the 4 oz of chopped dark chocolate in a heat-safe bowl. Pour the hot brown butter directly over the chocolate. Let it sit for 2-3 minutes to melt, then stir until completely smooth.
- Whisk in the dissolved coffee and sift in the cocoa powder. Mix until you have a smooth, glossy chocolate mixture.
Step 4: The Aeration Trick (For the Crackly Top)
- This is key for that classic brownie texture! In a separate large bowl, whisk the room-temperature eggs and sugar together vigorously for 2-3 minutes. The mixture should become pale, thick, and fluffy.
- Pour the warm chocolate mixture into the fluffy eggs and whisk until just combined.
- Sift in the flour and salt, and gently fold with a spatula. Finally, fold in the remaining 3 oz of chopped chocolate.
Step 5: The Artful Assembly
- Spread about ⅓ of the brownie batter in a thin, even layer on the bottom of your prepared pan.
- Dollop large spoonfuls of the cookie dough batter over the brownie layer, leaving some gaps.
- Spoon the remaining brownie batter into the gaps and over some of the cookie dough.
- Use any remaining cookie dough to dollop on top. The goal is a patchwork or mosaic effect, not a perfect swirl. This ensures every bite has distinct cookie and brownie sections. Gently pat the top to level it slightly.
Step 6: The Bake (The Fine Line of Perfection)
- Bake in the preheated oven for 32-35 minutes. This is crucial: you want to underbake them slightly. The edges should look set, but a toothpick inserted in the center should come out with moist, sticky crumbs, not wet batter. If it’s completely wet, give it another 2-3 minutes.
Step 7: The Cool Down (The Hardest, Most Important Step)
- Remove the pan from the oven and place it on a wire rack. Now, for the most difficult part: let the brown butter brookies cool completely in the pan for at least 30 minutes, or ideally 1-2 hours. This allows them to set, making them fudgy and easy to cut.
- Once cooled, use the parchment paper handles to lift the entire slab out of the pan. Cut into squares with a sharp knife and prepare for dessert bliss.

Frequently Asked Questions (FAQ) of Brown Butter Brookies
Why are Brown Butter Brookies so good?
Brown Butter Brookies are so good because they offer the best of both worlds! You get the rich, fudgy, intense chocolate flavor of a brownie combined with the chewy, buttery, vanilla-kissed satisfaction of a chocolate chip cookie. The textural contrast in every bite is what makes them truly special.
How long will Brown Butter Brookies last?
Stored in an airtight container at room temperature, Brown Butter Brookies will stay fresh and delicious for up to 4-5 days. If you want to keep them longer, they freeze beautifully for up to 3 months.
Does brown butter make cookies hard?
No, quite the opposite! Brown butter doesn’t make cookies hard. The process removes water from the butter, which can actually lead to a chewier, more concentrated flavor. Hardness in cookies is typically caused by over-mixing the flour (developing too much gluten) or overbaking.
How do I know when brookies are done?
The key is to underbake them slightly. They are done when the edges are set and look dry, but the center is still soft and a bit jiggly. A toothpick inserted in the center should come out with moist, sticky crumbs attached, not clean, and not covered in wet batter.
How to keep brown butter cookies from spreading?
The main culprits for spreading are butter that is too warm or melted (browning it actually helps!) and not enough flour. This recipe is balanced to prevent excess spreading. If you have issues, chilling the cookie dough portion for 15-20 minutes before assembly can also help.
How quickly do cookies go bad?
Homemade cookies like these, with no artificial preservatives, are best eaten within the first 3-4 days for optimal freshness. After that, they won’t necessarily be “bad” but may start to become dry or hard.
Final Thoughts from the Chef of Brown Butter Brookies
And there you have it—the delicious end of dessert indecision. We started this journey to solve the ultimate baker’s dilemma, and in the process, created something truly special.
The real secret to these irresistible brown butter brookies, as you now know, isn’t just a list of ingredients. It’s about building flavor from the ground up with that nutty, toasted brown butter. It’s about respecting the integrity of both the chewy cookie and the fudgy brownie, letting them shine together without becoming a muddled mess.
You haven’t just baked a dessert; you’ve mastered a concept. You now hold the key to a treat that will have friends and family asking, “What is in this?!” for years to come. This is the recipe you pull out for bake sales, for potlucks, or for a quiet Tuesday night when you simply need a little square of happiness.
Now I have to ask the ultimate question, the one that started it all: after tasting these, which part do you love more—the chewy, golden cookie, or the rich, fudgy brownie? I’d love to hear your verdict in the comments below!
Until our next baking adventure, enjoy every last crumb.
Happy Baking!
—Chef Andrew