
Introduction of Apple Danish
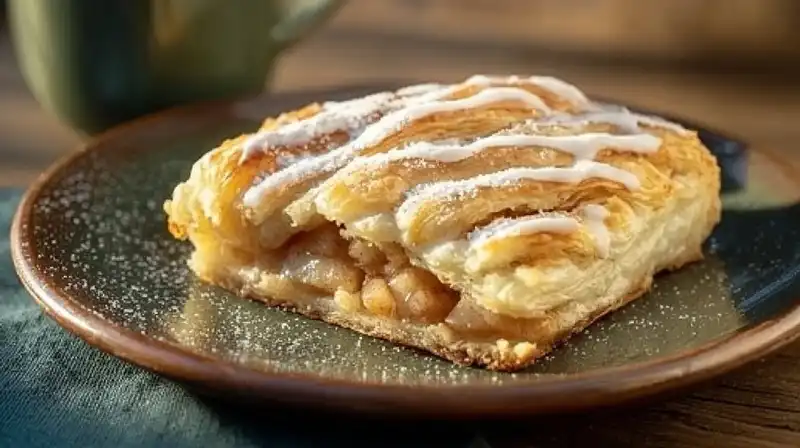
Imagine biting into a golden, flaky pastry that gives way to tender apples coated in a perfectly balanced mix of sugar and cinnamon. As a professional chef, I can tell you there are few things that bring as much satisfaction as pulling a freshly baked Apple Danish from the oven and seeing the glossy glaze catch the light. This dessert is more than a treat; it is a statement piece for your table and a guaranteed crowd-pleaser.
Table of Contents
Apple Danish is a classic in the world of pastries, loved for its delicate texture and comforting flavor profile. It offers the perfect contrast of buttery crust and juicy, fragrant apples. The recipe I am about to share is one I have perfected over years in the kitchen, ensuring each bite delivers the same magic whether you are baking for your family, hosting a brunch, or preparing a special gift for someone you care about.
What sets this Apple Danish apart is not just the taste but the method. From achieving a crust that stays crisp to making sure the apple filling is tender without being mushy, every step matters. I will guide you through these details so your finished pastry looks as good as it tastes. Once you try this version, you might find yourself making it again and again.
Apple Danish 7 Amazing Secrets for Perfect Pastry
Equipment
- 15x10x1 inch baking pan
- Rolling Pin
- Mixing bowls
- Pastry brush
- Measuring Cups and Spoons
- Wire cooling rack
Ingredients
Pastry
- 3 cups all-purpose flour
- 1/2 tsp salt
- 1 cup shortening
- 1 large egg yolk
- 1/2 cup 2% milk
Assembly
- 6 cups apples peeled and sliced
- 1 1/2 cups granulated sugar
- 1/4 cup butter melted
- 2 tbsp all-purpose flour for thickening
- 1 tsp ground cinnamon
- 1 large egg white lightly beaten, for brushing
Glaze
- 1/2 cup confectioners’ sugar
- 2 to 3 tsp water to desired consistency
Instructions
Prep Oven and Pan
- Preheat oven to 375°F (190°C). Grease a 15x10x1 inch baking pan.
Make the Pastry
- Whisk flour and salt in a large bowl. Cut in shortening until the mixture looks like coarse crumbs.
- Whisk egg yolk with milk. Add to the flour mixture and stir just until the dough comes together. Divide into two equal pieces and flatten into rectangles.
Bottom Layer
- On a lightly floured surface, roll one piece into a 15×10 inch rectangle. Transfer to the prepared pan, pressing gently to fit.
Apple Filling
- In a bowl, toss sliced apples with sugar, melted butter, flour, and cinnamon until evenly coated.
- Spoon the apple mixture evenly over the pastry in the pan.
Top Layer and Bake
- Roll the second piece of dough into another 15×10 inch rectangle. Lay over the filling. Brush the surface with lightly beaten egg white.
- Bake for 40 minutes, or until the pastry is deep golden and crisp. Cool on a wire rack 15–20 minutes.
Glaze and Serve
- Stir confectioners’ sugar with enough water to create a smooth drizzle. Pour over warm pastry. Slice into squares and serve.
Notes
More Recipes You Might Enjoy:
Jewish Apple Cake 7 Irresistible Secrets for Perfect Moistness
Baked Oatmeal Cups You’ll Crave in 6 Easy Steps
Or go to my Pinterest.
Why You’ll Love This Recipe “Apple Danish”
- Perfect Balance of Flavors – The sweetness of the apples and sugar meets the warmth of cinnamon, creating a pastry that is both comforting and irresistible.
- Flaky, Buttery Pastry – Every bite begins with a crisp, golden crust that melts in your mouth.
- Simple Ingredients, Big Results – No complicated shopping lists, just fresh apples, pantry staples, and a touch of care.
- Versatile Dessert or Breakfast – Serve it warm with coffee in the morning or with ice cream as a decadent dessert.
- Crowd-Pleasing Presentation – Its beautiful, glossy glaze and golden finish make it ideal for gatherings and holidays.
This Apple Danish stands out because of the attention to texture and freshness. Many versions rely on overly processed fillings or shortcuts that leave the crust soggy. Here, you get crisp layers and a luscious apple center that holds its shape. The glaze adds just the right amount of sweetness without overpowering the fruit.
When you bake this at home, the aroma alone will draw people into the kitchen. It is the kind of pastry that sparks conversation and leaves your guests asking for the recipe. Whether you are serving it for a holiday breakfast or as a sweet ending to a cozy dinner, it will deliver warmth, nostalgia, and undeniable charm.
Ingredients Needed for Apple Danish
For the Pastry
- 3 cups all-purpose flour – Provides the base structure for the dough.
- ½ teaspoon salt – Enhances overall flavor.
- 1 cup shortening – Creates a tender, flaky texture.
- 1 large egg yolk – Adds richness and helps bind the dough.
- ½ cup 2% milk – Brings moisture and softness to the pastry.
For the Assembly
- 6 cups apples, peeled and sliced – Choose fresh, crisp apples for the best texture and flavor.
- 1½ cups granulated sugar – Sweetens the filling while balancing the tartness of the apples.
- ¼ cup butter, melted – Infuses richness into the apple filling.
- 2 tablespoons all-purpose flour – Helps thicken the filling so it does not leak during baking.
- 1 teaspoon ground cinnamon – Adds warmth and depth to the apple flavor.
- 1 large egg white, lightly beaten – Used for brushing the pastry to give it a beautiful golden finish.
For the Glaze
- ½ cup confectioners’ sugar – Creates a smooth, sweet topping.
- 2 to 3 teaspoons water – Adjust to reach the perfect drizzling consistency.
How to Make Apple Danish
Prepare the Pastry Dough
- In a large mixing bowl, combine the all-purpose flour and salt. Add the shortening and cut it into the flour using a pastry cutter or fork until the mixture forms coarse crumbs.
- In a small bowl, whisk together the egg yolk and milk. Pour this mixture into the flour blend and stir just until the dough comes together. Do not overmix—this keeps the pastry tender.
- Divide the dough into two equal portions, shaping each into a flat disc. Cover and set aside while preparing the filling.
Roll Out the Bottom Layer
- On a lightly floured surface, roll one portion of the dough into a rectangle measuring about 15 x 10 inches.
- Transfer the rolled dough to a greased 15 x 10 x 1-inch baking pan, pressing gently to fit.
Make the Apple Filling
- In a large bowl, toss the sliced apples with sugar, melted butter, flour, and ground cinnamon until the fruit is evenly coated. This coating helps the filling thicken and stay juicy without becoming watery.
Assemble the Danish
- Spread the prepared apple filling evenly over the bottom pastry layer in the baking pan.
- Roll out the remaining dough into another 15 x 10-inch rectangle and carefully lay it over the apples.
- Brush the top layer with lightly beaten egg white to create a glossy, golden finish.
Bake the Danish
- Preheat the oven to 375°F (190°C). Bake for 40 minutes or until the pastry is golden brown and crisp.
- Remove from the oven and let cool on a wire rack for at least 15–20 minutes before glazing.
Add the Glaze
- In a small bowl, mix confectioners’ sugar with enough water to create a smooth, drizzling consistency.
- Using a spoon or piping bag, drizzle the glaze over the slightly warm pastry.

Serve and Enjoy
- Slice into squares with a sharp knife. Serve warm for the best flavor and texture.

Serving and Storage Tips of Apple Danish
Serving Suggestions
- Serve your apple danish slightly warm for the best texture and flavor. The pastry will be crisp on the outside while the filling remains soft and fragrant.
- For a bakery-style presentation, dust the top with extra confectioners’ sugar just before serving.
- Pair with a scoop of vanilla ice cream or a dollop of whipped cream for a decadent dessert option.
- For breakfast or brunch, serve alongside freshly brewed coffee or spiced tea.
Storage Tips
- Room Temperature: If you plan to consume the apple danish within 1–2 days, store it in an airtight container at room temperature to maintain its crispness.
- Refrigeration: For longer freshness, store in the refrigerator for up to 5 days. Make sure it is wrapped well or placed in an airtight container to prevent it from drying out.
- Freezing: To freeze, allow the danish to cool completely, then wrap tightly in plastic wrap followed by aluminum foil. Store for up to 2 months. Thaw overnight in the refrigerator before reheating.
Reheating Tips
- Warm slices in a 350°F (175°C) oven for about 8–10 minutes to restore crispness. Avoid microwaving for too long, as it can make the pastry soggy.
Helpful Notes of Apple Danish
- Apple Variety Matters: Choose firm, slightly tart apples like Granny Smith or Honeycrisp. They hold their shape during baking and balance the sweetness of the filling.
- Prevent Soggy Pastry: Pat the apple slices dry before layering them on the dough. This reduces excess moisture and helps maintain a crisp pastry.
- Glaze Control: For a more decorative look, drizzle the glaze in thin zig-zag patterns instead of covering the pastry entirely. This keeps the top crisp while adding a touch of sweetness.
- Flavor Boost: Add a pinch of nutmeg or ground cloves to the cinnamon-sugar mixture for a warmer, spicier flavor profile.
- Texture Upgrade: Sprinkle a few chopped nuts, such as pecans or walnuts, over the apple filling before adding the top crust for added crunch.
- Make Ahead Tip: Prepare the dough and apple filling a day in advance. Store them separately in the refrigerator, then assemble and bake when ready.
Conclusion of Apple Danish
This Apple Danish is more than just a pastry — it is a celebration of crisp, buttery layers embracing a sweet and fragrant apple filling. Every bite delivers a perfect harmony of textures, from the flaky crust to the tender fruit, and the light drizzle of glaze ties it all together with just the right amount of sweetness. Whether served warm from the oven or at room temperature, it is guaranteed to make mornings brighter and gatherings more memorable.
One of the reasons this recipe stands out is its balance of simplicity and elegance. You do not need professional baking skills to create a treat that looks bakery-worthy and tastes even better. The rich, homemade pastry combined with fresh apples creates a comforting dessert that is equally at home on a holiday table or as a weekday indulgence.
If you try this Apple Danish, I would love to hear how it turned out for you. Did you use a different type of apple? Did you add extra spices or perhaps drizzle with a flavored glaze? Share your variations and baking tips in the comments below so we can inspire each other.
If you enjoyed this recipe, please give it a star rating and share it with friends and family on Pinterest or Facebook. A warm, homemade Apple Danish is a joy worth sharing, and your feedback helps keep these timeless recipes alive in kitchens everywhere.
Frequently Asked Questions
Does apple danish need to be refrigerated?
If you plan to eat it within 1–2 days, you can store it at room temperature in an airtight container. For longer storage, refrigerate it to maintain freshness and prevent the filling from spoiling.
Can apple danish be frozen?
Yes. Once cooled completely, wrap the Danish tightly in plastic wrap and then in aluminum foil. Freeze for up to 2 months. Thaw in the refrigerator overnight before reheating.
How to fold apple danish?
For a classic look, roll out the dough, place the filling in the center, and fold over the sides so they overlap slightly. You can also cut strips along the sides of the dough and braid them over the filling for a bakery-style presentation.
How to reheat apple danish?
Preheat your oven to 350°F (175°C). Place the Danish on a baking sheet and warm for 8–10 minutes to restore crispness without drying it out. Avoid microwaving, as it may make the pastry soggy.
How long are danishes good for?
When stored in an airtight container at room temperature, they stay fresh for up to 2 days. In the refrigerator, they last up to 5 days.
How many days can an apple last without refrigeration?
Whole apples can last about 5–7 days at room temperature, depending on ripeness and storage conditions. However, once peeled or sliced, they should be refrigerated and eaten within 1–2 days.