
Red Velvet Cinnamon Rolls used to be one of those dishes I only made for special occasions because they seemed complicated. But here’s the good news: I’ve nailed down a simple approach that takes the fuss out of the process! With straightforward steps and easy-to-find ingredients, you can whip up these stunning rolls any time. Plus, the results? They’re decadent, gooey, and perfect for the weekend—or any day you want a little indulgence. Once you give this recipe a try, you’ll probably find yourself making them more than just once a year!
Recipe Card – Red Velvet Cinnamon Rolls
Red Velvet Cinnamon Rolls
Equipment
- Mixing Bowl
- Baking pan
- Rolling Pin
- Oven
Ingredients
Ingredients
- 500 g All-purpose flour
- 200 ml Milk warm
- 50 g Butter melted
- 100 g Granulated sugar
- 20 g Cocoa powder
- 7 g Active dry yeast
- 2 large Eggs
- 50 g Brown sugar for filling
- 15 g Ground cinnamon for filling
- 100 g Cream cheese for frosting
- 100 g Powdered sugar for frosting
- 50 ml Heavy cream for frosting
Instructions
- In a mixing bowl, combine warm milk, sugar, and yeast. Let it sit for 5 minutes until foamy.
- Add melted butter, eggs, cocoa powder, and flour to the yeast mixture. Knead until smooth, then let it rise for about 1 hour until doubled in size.
- Preheat your oven to 175°C (350°F). Roll the dough into a rectangle and sprinkle with brown sugar and cinnamon.
- Roll tightly and slice into even pieces. Place in a baking pan and let rise again for about 30 minutes.
- Bake for 25-30 minutes until golden. Allow to cool slightly.
- While the rolls cool, whisk together cream cheese, powdered sugar, and heavy cream to make the frosting.
- Drizzle the frosting over the warm rolls and enjoy!
Notes
More Recipes You Might Enjoy:
Raspberry Vanilla Cream Crepes recipe
Or go to my Pinterest.
What Are Red Velvet Cinnamon Rolls and Why They’re So Delicious
History and Appeal
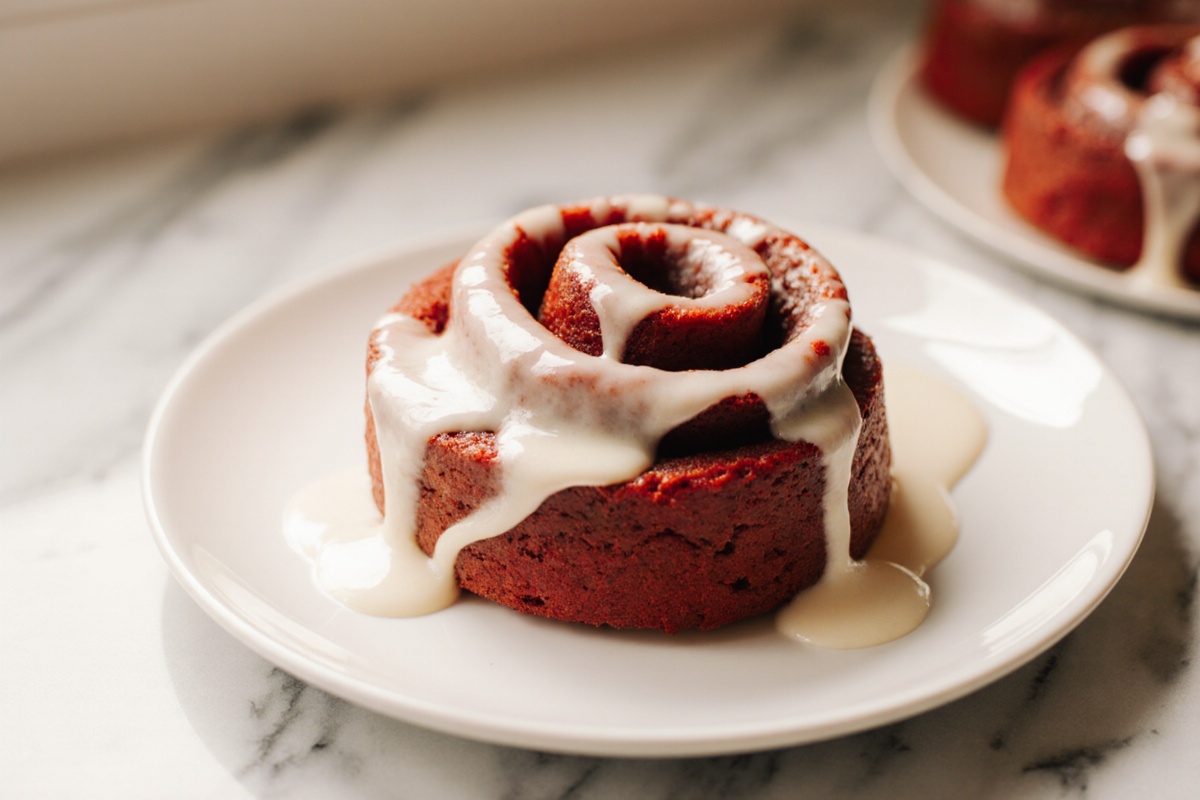
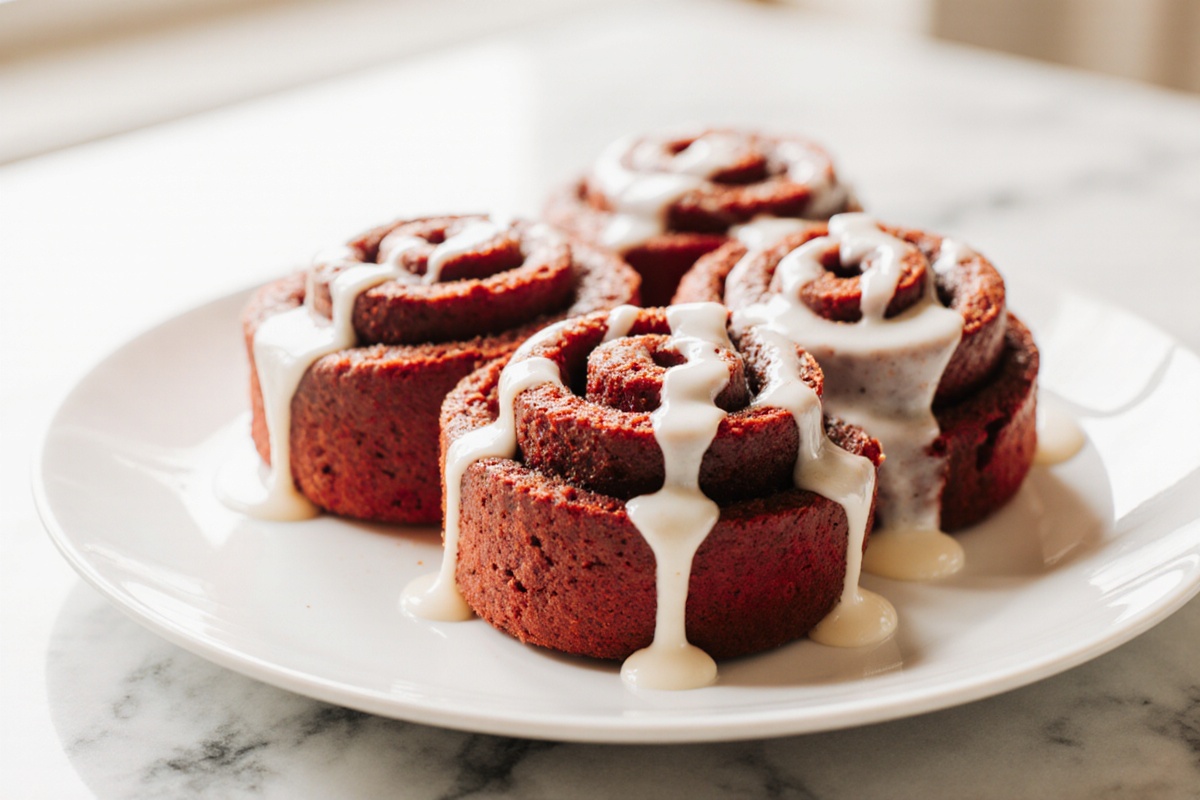
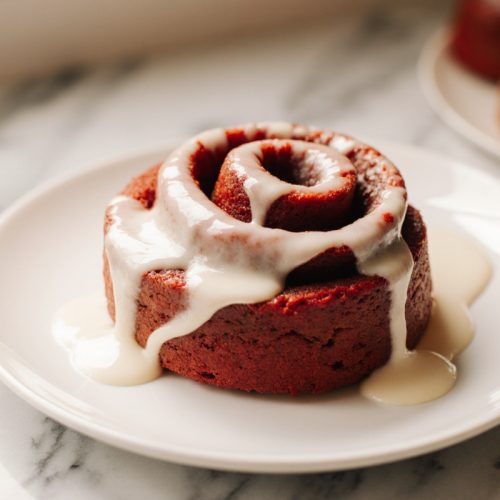
Red Velvet Cinnamon Rolls combine two amazing dessert favorites: the rich look of red velvet and the warm, inviting scent of cinnamon rolls. Imagine soft, chocolate-colored dough layered with a sweet cinnamon-sugar filling, all rolled up into a spiral that shines like a jewel. I aim to create both a stunning visual and a cozy, indulgent treat in every bite. These rolls can turn an ordinary morning into a celebration. The way they sparkle with a shiny glaze and hold their shape when cut is enough to make any day feel special. These beauties can gather friends around the kitchen island, sharing stories as the delightful scent fills the air. If you want something that looks fancy yet feels easy to make, Red Velvet Cinnamon Rolls are just the ticket. Trust me, they’re worth the wait.
But it’s not just about how they look. The color suggests a rich chocolate flavor without being too bold, while the cinnamon adds warmth that keeps each bite exciting. The swirl shows off your technique—rolling evenly, sealing edges, and cutting neatly—resulting in beautiful, uniform spirals. This recipe is forgiving, and with a few careful steps, you’ll achieve bakery-quality results right at home. If you’ve ever wished for a dish that impresses while being comforting at the same time, this is your new favorite. I’ve even managed a few dramatic swirls that took me by surprise—which is why I love making these for special events and laid-back Sundays alike.
Key Ingredients Explained
The idea behind Red Velvet Cinnamon Rolls is to blend the essence of velvet cake with classic cinnamon-roll techniques. The dough should be soft and stretchy, capable of a gentle rise, while the filling brings warmth and sweetness to complement the velvety notes. We use a cocoa-infused batter and just the right amount of color to create that lovely deep red without overpowering the cinnamon. A smooth, creamy frosting or glaze finishes the rolls, adding a tangy contrast that brightens every bite. Each element plays a role: the dough gives structure, the filling adds sweetness and aroma, and the finish ties everything together beautifully. If you want to master balancing these components, start with even rolling, consistent slicing, and finish with a glaze that highlights the flavors instead of overwhelming them. And yes, a pinch of salt can elevate the taste significantly.
Classic Red Velvet Cinnamon Rolls Recipe
Ingredients You’ll Need
For Red Velvet Cinnamon Rolls, you’ll need a soft, workable dough, a yummy cinnamon-sugar filling, and a glossy frosting to bring it all together. Begin with a basic dough that yields a tender bite and rolls out smoothly. For the filling, a generous swirl of cinnamon and sugar creates that delightful aroma and sweetness. Top it off with a creamy frosting that has a hint of tanginess to balance the velvet sweetness. Ingredient lists may vary, but the essentials are straightforward: dough for structure, filling for warmth and aroma, and frosting for that final touch. Organize your ingredients so you can move through the process easily. Don’t sweat it if you’re new to rolling; just apply even, steady pressure for clean spirals and lovely layers.
Step-by-Step Instructions
Here’s a simple method to follow. Start by making the dough, kneading it until smooth and soft, then letting it rise until it’s about doubled. Roll it out into a rectangle, spread the filling evenly, then roll it up tightly along the long side. Slice into even pieces and place them on a baking pan, allowing for a final rise until they’re puffed up.
Preheat your oven to 350°F (175°C) and bake for about 25–30 minutes until the tops are set and the edges just begin to brown. While they’re baking, mix up a smooth glaze or frosting that’s pourable. Once they’re out of the oven, drizzle the glaze while they’re warm so it seeps into the swirls. If you prefer crisp edges, bake them for slightly less time; for a softer center, let them go a bit longer. I’ve scorched a batch or two in my early kitchen adventures, so learning to time the bake definitely pays off.
Air Fryer Method
The air fryer provides a quicker method for making smaller batches of Red Velvet Cinnamon Rolls. Preheat it to around 325°F (165°C). Place a few rolls in a single layer, allowing for some space. Cook for about 8–12 minutes, checking for a light golden color and a firm center. The cooking time may vary depending on your model, so keep checking and rotate the pan if necessary for even browning. After they’re cooked, let them rest briefly before glazing. The result is a perfectly sized roll with a crisp exterior and a soft interior. This method is fantastic for testing out flavors or when you want a small treat without turning on the big oven.
Nutrition Facts and Health Tips
Per Serving Breakdown
A serving of Red Velvet Cinnamon Rolls offers a rich treat packed with energy. It combines carbohydrates from the dough, fats from the filling and frosting, and a touch of protein from dairy. The cocoa and color accents bring depth without weighing you down. If you’re aiming for balance throughout your day, pair one roll with some fresh fruit or yogurt for breakfast and enjoy a green salad later on. Keeping portions reasonable allows you to indulge without pushing your goals aside. For a festive weekend brunch, sharing a few rolls with friends creates a joyful atmosphere while keeping the portions just right.
Healthier Swaps
If you want to lighten up Red Velvet Cinnamon Rolls a bit, there are some easy swaps. You can use whole-wheat flour or a mixture of white and whole-wheat for extra fiber without losing texture. Opt for a lighter frosting, such as a yogurt-based glaze or a reduced-fat cream cheese frosting, and consider cutting back on the sugar used in the filling. Experimenting with plant-based milks and less butter in the dough can drop saturated fat while keeping that lovely soft crumb. The secret is to keep the filling tasty—spices like cinnamon, hints of vanilla, and a pinch of salt can add a lot without needing tons of sugar. Remember, great flavor usually comes from the balance between the filling and glaze, not from piling on the sweetness.
Delicious Variations to Try
Regional Twists
You can turn Red Velvet Cinnamon Rolls into local favorites with just a few thoughtful changes. One idea is to add orange zest to the filling for a fresh citrus note that works wonderfully with the velvet base. Alternatively, you could mix in a bit of cardamom or allspice for a warm, spiced flavor that reminds you of holiday treats. You might also try a maple glaze or a cream cheese frosting with a hint of vanilla bean for more depth. Each variation shifts the aroma and flavor while keeping that signature swirl intact. The joy is in making small tweaks to discover new flavors without losing what makes these rolls so appealing.
Diet-Friendly Options
There are several simple ways to make Red Velvet Cinnamon Rolls friendlier for different dietary needs. For those avoiding gluten, use a gluten-free flour blend designed for yeast breads, following the package instructions for water and resting times. To keep it dairy-free, swap the frosting for a coconut cream-based glaze or a cashew-based cream cheese alternative, and use plant-based milk in the dough. If you want to cut down on sugar, you can try using natural sweeteners and fruit purees in the filling, though you may notice some changes in texture. These variations let you enjoy the comforting look and flavor of velvet color and cinnamon warmth without compromising your dietary choices.
Pro Tips and Common Mistakes
Flavor Boosters
Small changes can lead to big improvements. Just a pinch of sea salt in the dough can lift the overall taste. Adding subtle flavors like espresso powder to the dough or vanilla to the filling can really enhance the chocolate notes. If you want a shiny finish, use a light glaze that barely coats the top, allowing the swirls to shine through. For a more vibrant color, a tiny bit of red food coloring can intensify the hue without overwhelming the flavors. The key is to focus on balance—combining savory notes in the dough with a light touch in the frosting.
Troubleshooting Guide
If your rolls come out dry, they probably baked for too long, or the dough wasn’t kneaded enough for proper gluten development. Cover the pan with foil during the last few minutes of baking to trap moisture. If the rolls split or lose their shape, they may have risen too long—next time, shorten the first rise and roll them tighter. For uneven fillings, make sure you spread it consistently before rolling and apply even pressure to avoid air pockets. If your glaze pools or runs, try adding a little more sugar to thicken it or let it sit for a minute at room temperature before using. With some practice, you’ll find the perfect balance between soft centers and shiny finishes.
FAQ – Red Velvet Cinnamon Rolls
Make-Ahead Tips
Yes, you can plan ahead. Mix and pre-rise the dough, then refrigerate the filled, rolled logs overnight. In the morning, slice, proof briefly on your baking sheet, and bake as directed. This approach lets you wake up to the aroma of fresh rolls without a long morning lead time. If you want to freeze it, assemble the rolls, freeze them raw on a sheet tray, then transfer to a bag; bake from frozen, adding a few extra minutes to the bake time. I like this method for holiday mornings when a little advance prep goes a long way.
Dairy-Free Options
Dairy-free variations are absolutely doable. Use plant-based milks in the dough and a dairy-free butter substitute for the filling, if you like, to maintain texture. For the frosting, swap in a coconut cream or almond-based cream cheese alternative, whisked with a splash of dairy-free milk to reach a smooth, pourable consistency. The technique remains the same, so you can still enjoy the signature swirl and velvet color. If you’re new to dairy-free baking, start with a small batch to dial in the sweetness and tang you prefer.
Why Use Cocoa?
Cocoa powder contributes depth, color, and a faint chocolate note that complements the cinnamon-sugar filling. It’s what gives Red Velvet Cinnamon Rolls their velvet character and helps the dough maintain its rich appearance even after baking. Using cocoa lets you achieve that distinctive look without relying on artificial colors. If you’re sensitive to color, you can tone it down slightly and let the color come primarily from other natural accents or food-safe coloring.
Get Vibrant Red Color?
To achieve a vivid red, many bakers use a small amount of red food coloring added to the dough or the frosting mixture. Gel-based colorings provide intense color with less moisture transfer, which helps maintain dough texture. If you prefer a natural route, a touch of bright beet juice can impart color, but it may alter flavor slightly. Start with a conservative amount and adjust in small increments to reach your preferred shade while keeping the taste balanced.
Freezing Instructions?
You can freeze baked rolls for later enjoyment. Wrap individually and store in an airtight container. To reheat, warm in a 300–325°F (150–165°C) oven for 8–12 minutes, or until warmed through and the glaze softens. For unfrosted dough, you can freeze the rolled logs; thaw, proof, slice, and bake as usual. Freshly baked rolls are best, but this approach gives you flexibility for busy weeks or special occasions.
Conclusion
Once you’ve baked your Red Velvet Cinnamon Rolls, the first thing you’ll notice is that rich, inviting aroma wafting through your kitchen. When you pull them apart, you’ll see that satisfying swirl – a soft, tender roll with just the right hint of gooeyness. The glossy glaze adds a bright finish, making them look just as good as they taste. I promise, you’ll feel accomplished and excited to share these delights with anyone lucky enough to be around. Give it a try – you might be surprised how simple and satisfying this recipe can be on a busy weeknight!