
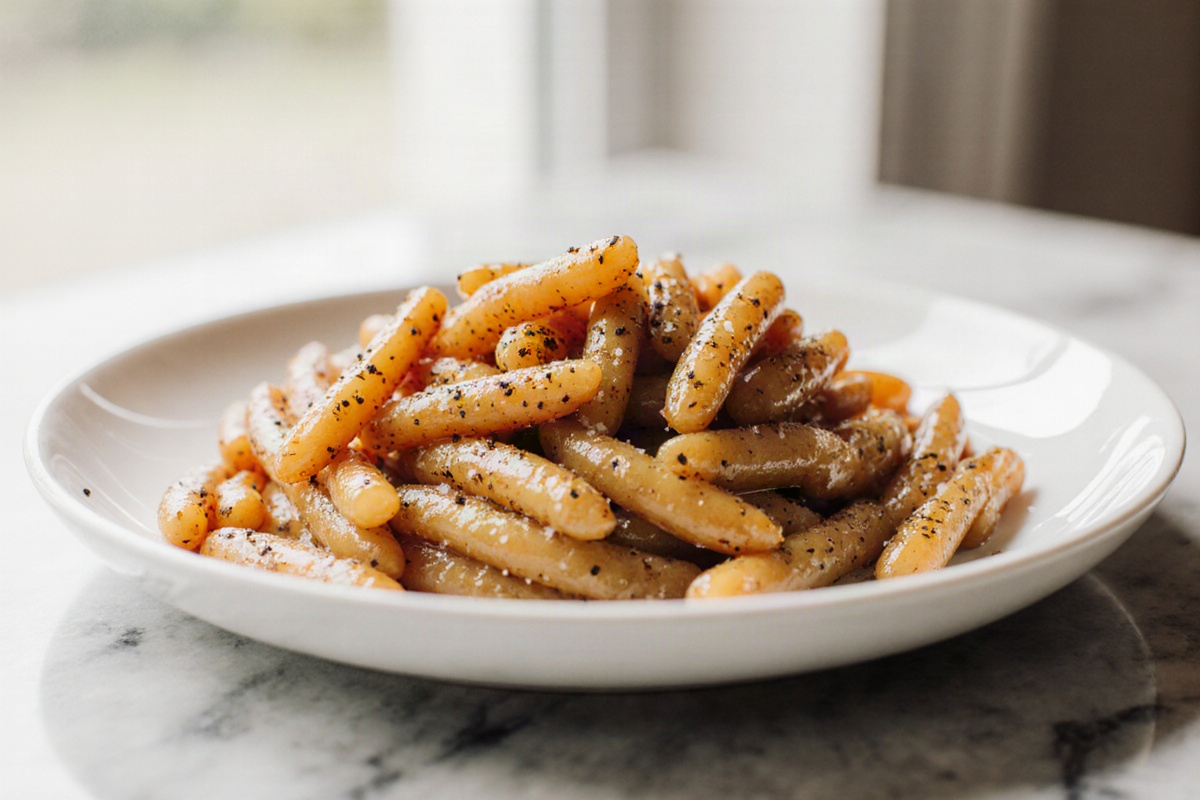
Air fryer Butter Beans used to be a dish I didn’t tackle often because I feared they might turn out soggy or bland. However, after experimenting with various methods, I’ve discovered this easy recipe that delivers perfectly crispy snacks with minimal fuss. It’s quick, requires just a few simple ingredients, and the air fryer does the heavy lifting, giving you a deliciously crunchy exterior while keeping the insides tender and creamy. Trust me, once you try making butter beans like this, they’ll become a staple for your weeknight meals or snacking.
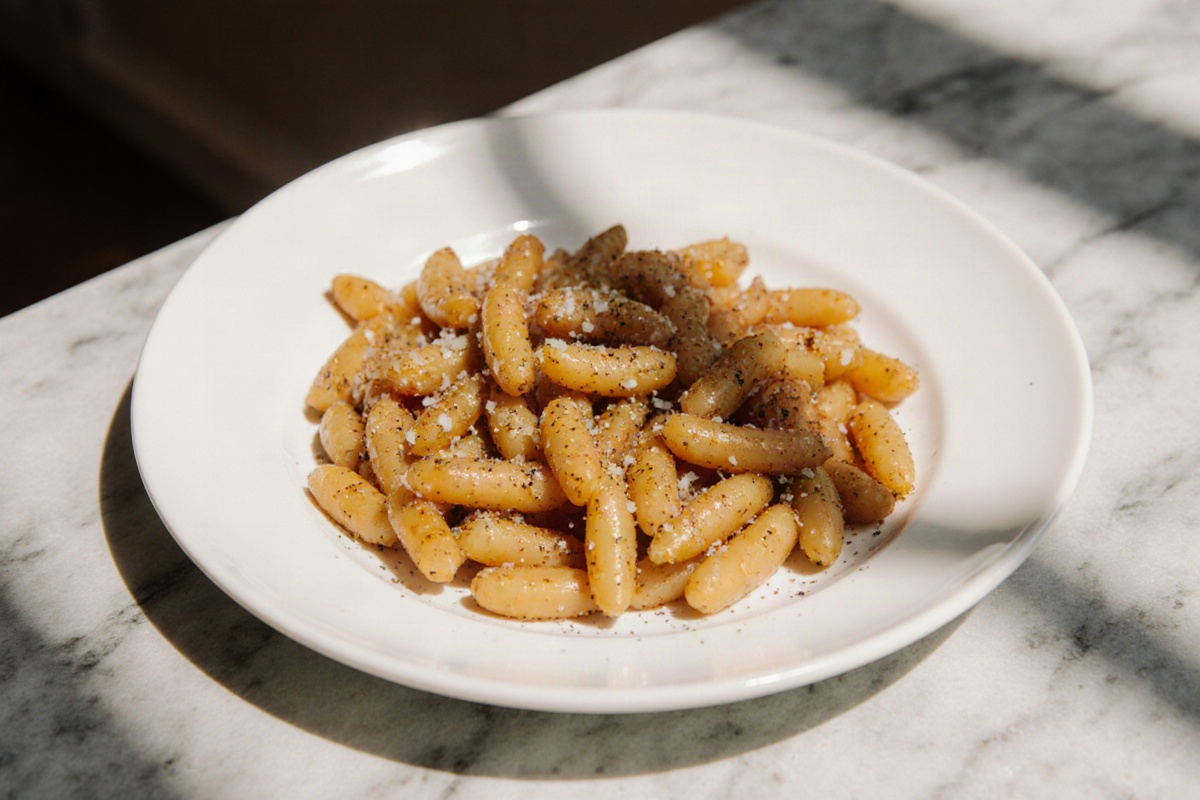
Get ready to crunch on these air fryer Butter Beans!
Recipe Card – Air fryer Butter Beans
Crispy Air Fryer Butter Beans
Equipment
- Air Fryer
- Mixing Bowl
- Paper towels
Ingredients
Ingredients
- 400 g Canned butter beans drained and dried well
- 15 ml Olive oil or neutral oil
- 5 g Salt
- 2 g Black pepper
- 5 g Garlic powder optional
- 5 g Paprika optional
Instructions
- Drain and rinse the canned butter beans under cool running water. Pat them dry with paper towels until they are free of excess moisture.
- In a mixing bowl, lightly coat the beans with olive oil and sprinkle salt, pepper, and any optional seasonings you prefer. Toss to ensure even coverage.
- Preheat your air fryer to 200°C. Place the seasoned beans in a single layer in the air fryer basket.
- Air fry the beans for about 8–12 minutes, shaking the basket halfway through for even cooking. Start checking at 7 minutes to prevent overcooking.
- Once they are golden and crisp, remove from the air fryer and allow to cool slightly before serving.
Notes
Crispy Air Fryer Butter Beans
What Are Butter Beans?
Butter beans, or Lima beans, are large, pale beans that have a naturally creamy center and a mild, buttery taste. They hold their shape nicely when cooked, but they become wonderfully tender and almost buttery when prepared right. Here, I’ll show you how to turn them into a delightful, crunchy snack using your air fryer—great for a quick side or a satisfying nibble. Trust me, I’ve burned a batch or two in my early days, but this method gives you a reliable crunch with minimal hassle.
You can find butter beans canned or dried, so you can use whatever you have on hand. When they’re roasted to crispy perfection, the outside becomes delightfully crackly while the inside remains soft and flavorful. The air fryer makes this balance easier to achieve than frying in a pan, with less oil and mess. If you’re new to them, this is a friendly way to discover how versatile they can be.
In short, you’ll need beans, a light coating of oil, and seasonings you love. Canned beans are the easiest starting point, but drying your own beans adds extra flavor. The trick is to dry the beans well before cooking so you get that perfect crispy surface.
Why This Recipe Works
The magic of Crispy Air Fryer Butter Beans lies in how hot, circulating air creates a quick, even crust while keeping the centers tender. Even a tiny amount of oil helps stick the seasonings to each bean and encourages browning without turning them soggy. I’ve found that starting with well-dried beans helps avoid steam inside the coating, which is the enemy of crispiness.
Another reason this method works so well is the control it offers. The air fryer lets you keep an eye on color and texture in real time, so you can take them out the moment they’re golden and crisp. A quick shake halfway through ensures every bean gets evenly heated and prevents sticking. If you’ve had trouble getting beans to crisp before, this approach gives you tasty, snackable results.
This recipe also uses simple, pantry-friendly seasonings, so no need for a long list. A light touch of oil, salt, and pepper is enough to wake up the beans, with optional spices to add extra flavor. I like to keep it flexible so you can prepare them for dipping, snacking, or as a quick addition to meals. And yes, you can make a big batch with minimal cleanup.
Ingredient Overview
The main ingredients are butter beans, a small amount of oil, and flavor enhancers. Start with canned beans (drained and dried well) or dried beans that you cook first and then dry before roasting. For the oil, a drizzle of olive oil or a neutral oil works best to encourage browning, but you don’t need much—a little goes a long way.
Common seasonings include salt and pepper as the base, with optional spices like garlic powder, paprika, cumin, chili powder, or lemon zest to brighten the flavor. You can stir in fresh herbs after cooking for a fresh finish. If you’re aiming for a specific flavor profile—Mediterranean, BBQ, or Asian-inspired—you can tweak the spices to match. The beauty of this recipe is its simplicity: keep the ingredient list short, but flexible enough to suit your pantry and cravings.
How to Make Butter Beans in the Air Fryer
Drain, Rinse, and Dry the Beans
Drain and rinse canned butter beans under cool running water to wash away the canning liquid and excess sodium. Gently pat the beans dry with a clean kitchen towel or paper towels until they are free of surface moisture. This step is key—any leftover moisture can cause the beans to steam instead of crisp up.
If you’re starting with dried beans, cook them until tender, then cool and dry as described. I recommend drying them well because moisture on the surface can detract from that crunch you’re after. For the best results, lay the beans in a single layer on a clean towel so they can air-dry a bit before you toss them with oil. This little pre-drying ritual can make a big difference in texture.
When you’re ready, lightly coat the beans with a small amount of oil and your chosen seasonings. The goal is to give each bean a thin sheen, not to soak them in oil. If you’ve ever over-oiled vegetables before air frying, you know the result—greasy instead of crispy. Keep it simple, and you’ll enjoy a better, crunchier bite.
Season the Butter Beans
Gently toss the dry beans with just enough oil to coat them lightly, then season with salt, pepper, and your chosen spices. Even distribution matters, so give them a good toss to ensure every bean is flavorful. If you adore garlic, a pinch of garlic powder can add a lot without overpowering their natural taste.
Beyond the basics, this is a great chance to get creative. Try lemon zest and dried oregano for a bright, Mediterranean flavor; go smokey with paprika and cumin; or add a pinch of chili flakes for some heat. I often squeeze a little lemon over the beans after cooking for a fresh finish. Remember: a little seasoning can enhance the flavor without overwhelming it.
Air Fry Until Golden and Crisp
Set your air fryer to 400°F and place the seasoned beans in a single layer in the basket. Cook for about 8–12 minutes, shaking the basket halfway through to encourage even browning. If you see the edges browning too fast, start checking at the 7–8 minute mark to avoid overcooking.
Cooking times can vary with different air fryer models, so treat the 8–12 minutes as a guideline. If your air fryer tends to run hot, start at 7 minutes and test for crispness. If it runs cooler, push closer to 12 minutes. The aim is to get a light, crackly exterior with a creamy, tender inside. When they’re done, they should look a rich golden brown and smell fantastic.
To get extra crispy beans, avoid crowding. If you have a large batch, cook them in batches and spread the beans out in a single layer each time. Pro tip: giving the beans a quick shake or toss at the halfway point helps ensure even crisping and prevents a few from burning.
How to Tell When They Are Done
Finished beans will be golden and crisp on the outside while tender inside. When you bite into one, the surface should have a little crackle. If the beans feel soft and chewy, return them to the air fryer for another 1–2 minutes and check again. A couple of careful passes can really lock in a satisfying texture.
If you want to be precise, you can test one bean for texture and one for temperature; they should be warm all the way through without any bitter taste. In most home kitchens, you’ll know they’re perfect when the beans have that delightful crunch at the edges and a creamy center without any raw flavor. Trust your senses, especially your nose and your taste buds.
Tips for Extra-Crispy Butter Beans
Avoid Excess Moisture
Moisture is the enemy of crispiness, so take a minute to dry the beans thoroughly after rinsing. Any leftover moisture will create steam and give you soft beans instead of that satisfying crunch. Lay the beans on a clean towel and pat them dry, then let them air-dry for a moment before tossing with oil and seasonings.
If you see any condensation in the basket during cooking, stop and shake them, or lay a light parchment square for ventilation—though I usually don’t find that necessary. The main thing is dry beans. If they come out soggy, remind yourself to dry them better next time and keep the oil light. It’s a simple adjustment that makes a big difference in texture.
Do Not Overcrowd the Basket
Air needs room to flow around the beans, so don’t stack them or pile them up. Overcrowding creates steamed pockets instead of crisp edges. If you’re cooking a big batch, split it into two or three smaller batches and spread the beans in a single layer each time. This is one of those “small batches, big results” situations that saves you effort and guarantees better texture.
When you cook in batches, you can also experiment with different seasonings in each batch. It’s a fun way to have a little taste-testing session without committing to one flavor for all the beans. The crispy results are worth the extra steps.
When to Add Wet Ingredients
If you’re using wet glazes or wet ingredients (like honey glaze or soy sauce), add them after the beans come out of the air fryer. A quick toss with a glaze and a 1–2 minute return to heat is enough to set the coating without making it soggy. I like to mix them with a small amount of glaze and then pop them back in the air fryer for a final minute so the coating sticks and doesn’t pool.
If you’re using soy sauce-based marinades, consider brushing a light amount on after cooking instead of mixing it in before air frying, to keep a dry surface that turns nice and crispy. Wet additions can ruin the texture if they go in too early, so timing is key to getting that perfect crunch.
Common Mistakes and Fixes
Common missteps include not drying the beans, overcrowding, using too much oil, and cooking at too low a temperature. A dry surface with enough heat results in crispiness; skip either one, and you’ll get soft beans with limp, oily edges. Fixes are simple: pat dry more thoroughly, cook in batches, and raise the temperature to 400°F. If you’re tight on time, you can pre-dry the beans for 10–15 minutes to save time on prep for dried beans. It’s a payoff worth your patience.
Another frequent issue is uneven sizes. If you’re working with beans of different sizes, cut larger beans in half or pick beans that are similar in size to ensure uniform crispiness. If they come out a bit dry, a light spray of oil and a quick 1–2 minute re-cook can restore that satisfying bite while keeping the crunch.
Flavor Variations and Serving Ideas
Mediterranean Butter Beans
For a bright, sun-kissed version, keep the beans simple with salt, pepper, a pinch of dried oregano, and a bit of lemon zest. Finish them with chopped parsley and a drizzle of olive oil. This version goes beautifully with olives, feta, and warm pita bread, making it a quick yet satisfying addition to a weeknight table.
If you’re looking for extra zing, add a little garlic powder and a pinch of sumac. The citrus notes help lighten up the dish and keep it lively. I love serving these over a bed of greens or alongside a cucumber-tomato salad to balance the savoriness with some tangy freshness.
BBQ and Southern-Style Butter Beans
Bring up the smoky flavor with paprika, smoked paprika, garlic powder, a touch of brown sugar, and a splash of cider vinegar. Toss the beans in that sweet-savory mix before air frying, then finish with a quick brush of your favorite BBQ sauce after cooking for a glaze that stays crispy.
This version makes a fantastic party snack or a hearty topper for sliders and baked potatoes. It also pairs wonderfully with coleslaw and cornbread to give you a comforting, Southern-inspired bite. If you’re serving kids, you can keep the spices milder or skip the brown sugar to balance sweetness and heat.
Asian-Inspired Butter Beans
Create a savory option with soy sauce or tamari, a dash of sesame oil, minced garlic or garlic powder, and some grated ginger. Toss in a few chili flakes for warmth, then finish with sesame seeds and chopped scallions. The result is a delicious, shiny batch that goes well with steamed rice or as a crunchy topping for noodle bowls.
If you’d like to keep it kid-friendly, skip the heat and use a light soy sauce with a splash of honey for a mild, glossy glaze. A bit of citrus zest at the end brightens the flavor without adding heat.
What to Serve with Them
These crispy beans make a versatile side or snack. Serve them with a fresh green salad and a tangy yogurt-dill dip for balance. They also pair nicely with warm bread or a simple grain bowl, where their crunch contrasts with creamy elements like hummus, avocado, or tahini-based sauces.
If you’re preparing for a crowd, a warm bowl of butter beans alongside roasted vegetables and grilled chicken or tofu creates a satisfying, well-rounded meal. They’re also great as a topping for soups or stews, adding texture and depth without heavy fats.
Frequently Asked Questions
Canned Versus Dried Beans
Canned butter beans are the quickest way to crispiness—just drain, rinse, dry, and go. Dried beans require soaking and longer cooking, but many cooks believe they develop richer flavors after roasting. For air frying, canned beans save time and still offer great texture when you dry them well and heat them properly.
If you’re using dried beans, plan for that extra step of cooking the beans until tender, then drying them before air frying. It’s worthwhile for the texture you gain, and you can customize the flavors more deeply with your seasonings. I often reach for canned beans on busy nights and dried beans when I want a richer, more personal flavor.
Storage and Reheating
Store any leftovers in an airtight container in the fridge for up to 4 days. Reheat in the air fryer at 350–375°F for 3–5 minutes, giving them a quick shake halfway through. This method keeps them crispy better than microwaving and helps stave off sogginess.
If you’re freezing, spread cooled beans on a sheet tray to pre-freeze individually, then transfer to a bag. Reheat directly from frozen in the air fryer, adding a minute or two to the cooking time. This method helps preserve texture when you warm them up later.
Vegan and Gluten-Free Options
This recipe is naturally vegan and gluten-free—perfect for different diets. Just make sure any spice blends or sauces you add don’t contain gluten or animal-derived ingredients you want to avoid. When in doubt, check labels on packaged spices and sauces and go for certified gluten-free products.
If you’re hosting vegan guests, pair the beans with a dairy-free dip or yogurt alternative and a refreshing green salad. These beans are protein-rich and satisfying, making them a fantastic base for plant-based meals.
Air Fryer Temperature and Timing
A common starting point is 375–400°F for 8–12 minutes, with a shake halfway through. If your air fryer tends to run hot, start at 380°F and check early; if it runs cooler, you may need a couple more minutes. The aim is to watch for that golden color—look for a deep golden, crisp exterior with tender centers.
Always treat timing as a guideline and adjust for your specific model. The beans you’re preparing today may behave a little differently than the ones I test in my kitchen, but with a bit of practice, you’ll find the perfect timing for your air fryer.
Video: Crispy Air Fryer Butter Beans | Easy 20-Minute Recipe
https://www.google.com/goto?url=CAESZQHrOzAVxlF67quLIDZVSs9Dd7ECvvRiXf1w_LoKFjn_Nq7LMrdC_ecegbgRIslbUfUkohslOVl7HPhZbOQrGIrYfsWaQpGivwoR5uSt7lEeUuRyRpHEhKf00BdZ-uPAMTV6srid
FAQ – Air fryer Butter Beans
What can I do if the dish turns out too dry?
Next time, try adding a bit more oil or reducing the cooking time by a couple of minutes. You can also check halfway through to see if they look dry and adjust as needed.
Can I use dried beans instead of canned?
Absolutely! Just remember to cook the dried beans until tender, then dry them thoroughly before air frying. While canned are quicker, dried beans offer a richer flavor.
How do I store leftovers?
Place any leftovers in an airtight container in the fridge for up to 4 days. For reheating, the air fryer works best at 350–375°F for around 3–5 minutes to maintain crispness.
Conclusion
When your Air fryer Butter Beans are done, they’ll be beautifully golden with that satisfying crunch and a warm, inviting aroma that fills your kitchen. The tender center with its mild, buttery flavor perfectly complements the crispy shell. I can assure you, with this method, you’ll find it hard to resist going back for seconds. So, grab those beans and give it a try – I bet you’ll be pleasantly surprised at how easy and satisfying this healthy snack can be!