
Cheeseburger Pockets used to be one of those dishes I presumed was too complicated for weeknights, but boy was I wrong. After some tasty trials, I’ve got a straightforward version that hits the spot without all the fuss. They’re simple to prepare, made with ingredients you probably already have on hand, and the best part? You can stuff them with whatever suits your fancy! Once these delicious pockets are baked, you’ll be amazed at how satisfying they are with minimal cleanup. Trust me, whether you’re feeding a crowd or just looking for a quick meal, these will likely become a favorite in your kitchen too.
Recipe Card – Cheeseburger Pockets
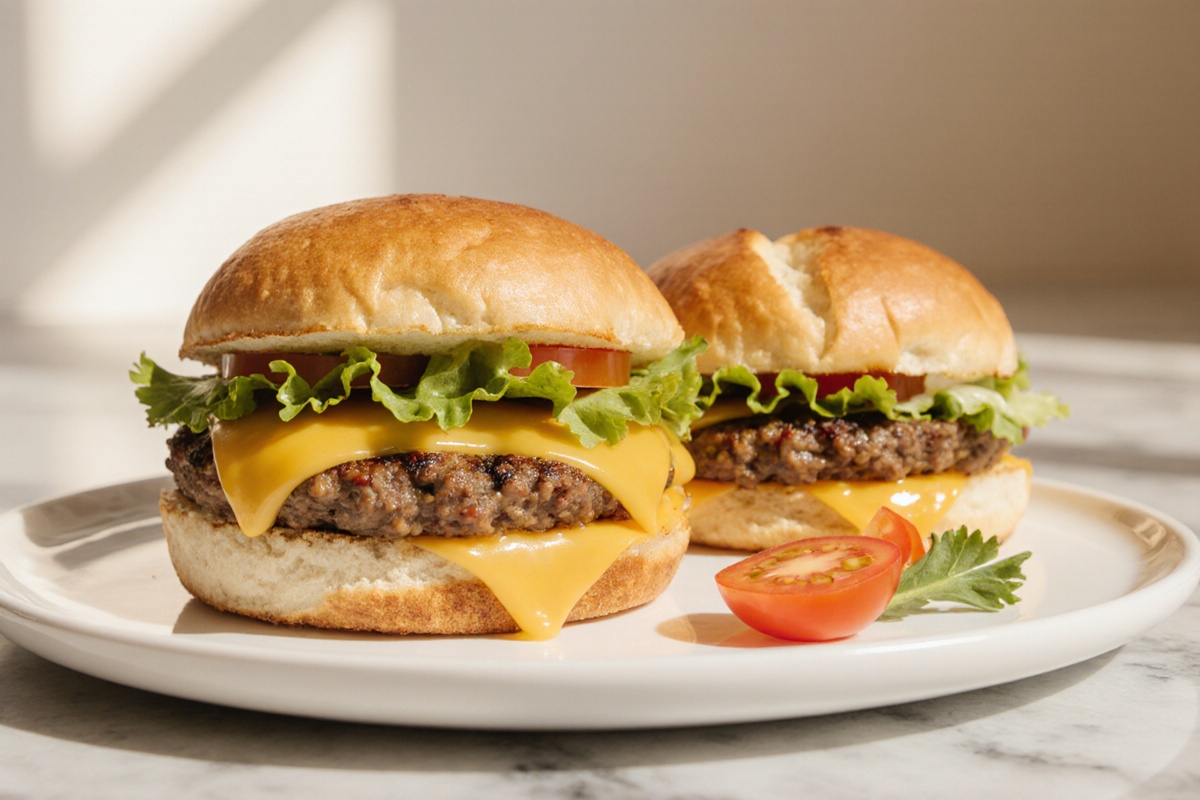
Cheeseburger Pockets
Equipment
- Oven
- Air Fryer
- Baking Sheet
- Parchment paper
- Meat Thermometer
Ingredients
Ingredients
- 500 g Ground beef or plant-based substitute
- 200 g Melting cheese
- 1 Egg (for wash)
- 1 pack Store-bought dough or refrigerated crescent-roll dough
- 1 tsp Salt
- 1 tsp Pepper
- optional Toppings (lettuce, tomato, pickles, onion)
- optional Sauces (ketchup, mustard)
Instructions
- Preheat the oven to 190°C (375°F) and line a baking sheet with parchment paper.
- Cook the ground beef or substitute until browned, seasoning with salt and pepper. Let cool slightly.
- Roll out the dough and cut into rounds or rectangles. Place a portion of filling in the center and bring the edges together to seal.
- Crimp the edges firmly, brush with egg wash, and place on the baking sheet.
- Bake for about 15–20 minutes, until golden and cheese is melted, checking with a meat thermometer to ensure filling reaches at least 71°C (160°F).
- Let the pockets rest for a few minutes before serving. Add any fresh toppings and sauces as desired.
Notes
Why Make Cheeseburger Pockets
Delicious Grab-and-Go Option
Cheeseburger Pockets are a yummy, portable solution for those hectic days. They let you enjoy a comforting burger without the need for extra plates or utensils, making them perfect for school or work lunches. Trust me, they travel well and stay tasty when packed in a sturdy container. Once baked and cooled, they’re easy to grab on the go, and they reheat nicely in just a few minutes.
Kid-Friendly Meal Idea
Kids can’t resist the gooey cheese and familiar flavors tucked inside a convenient pocket. You can easily customize them with milder fillings, which makes them a great option for picky eaters. Getting kids involved in shaping and sealing the pockets can turn mealtime into a fun activity, while also helping them build confidence in the kitchen. Let them pick a couple of toppings or sauces to finish off their meal.
Perfect for Meal Prep
This dish fits perfectly into weekly meal prep routines. You can bake a batch ahead of time and reheat portions for quick lunches or dinners. Make-ahead options include freezing baked pockets or freezing the assembled filling and dough separately for faster assembly later on. It’s a solid way to keep dinners rooted in familiar flavors while cutting down on last-minute stress.
Ingredients and Preparation
Essential Ingredients List
For the essential lineup, think of: ground beef or a plant-based substitute, a good melting cheese, and a dough that seals easily. You’ll also want basic seasonings, a little egg wash for sealing, and any optional toppings or sauces you love. This framework keeps things flexible while giving you that classic cheeseburger taste in pocket form.
Preparing the Filling
Cook the filling until the beef is browned and any moisture cooks away, then season to taste and let it cool slightly. You’ll want the filling to hold together without being greasy, so drain any excess fat after cooking. Once the filling is evenly seasoned and cooled enough to handle, it’s time to portion it into the pockets.
Dough Options
Choose between store-bought dough for speed, refrigerated crescent-roll dough for tender pockets, or homemade dough if you enjoy rolling it out. Store-bought options are convenient and reliable, while homemade dough usually gives a richer texture. Each option seals well with a little egg wash and careful crimping.
Assembling the Pockets
Roll the dough into rounds or rectangles, place a portion of filling in the center, and bring the edges together to seal. Crimp the edges firmly and brush with egg wash for a golden finish. Avoid overfilling, which can lead to leaks; using a modest amount is easier to seal and bake evenly.
Cooking Method and Time
Oven Baking Instructions
Preheat the oven to 375°F (190°C) and line a baking sheet with parchment paper. Place the pockets on the sheet, leaving space for them to puff up, and bake for about 15–20 minutes until golden and the cheese is melted. Use a meat thermometer to ensure the filling reaches at least 160°F (71°C) for safety.
Air Fryer Method
Preheat the air fryer to 350°F (175°C) and arrange the pockets in a single layer. Cook for 12–15 minutes, turning them halfway through, until the crust is crisp and the filling is hot. If needed, a final 2–3 minute blast helps the tops brown evenly.
Cooking Time Guidelines
Cooking times can vary based on the size of the pockets and the type of dough used, so start at the lower end of the time range and check for doneness. Larger pockets may need a couple more minutes; smaller ones will finish faster. Always verify that the filling hits a safe temperature and that the exterior is nicely browned before serving.
Checking Doneness
Look for a light, even golden crust and melted cheese peeking at the center. The filling should be steaming and reach the recommended internal temperature of 160°F (71°C). If the edges look pale or the dough seems undercooked, give them a few more minutes while keeping an eye on the browning.
Flavor Variations
Cheeseburger Pocket Toppings
Finish with crisp lettuce, tomato, pickles, or onion after baking for a fresh contrast. A quick sauce drizzle—like ketchup, mustard, or a tangy mayo—adds moisture and flavor. Keep toppings light and add them after baking to avoid sogginess and a soggy bottom.
Spicy Jalapeño Version
If you enjoy a little heat, add sliced jalapeños and some pepper jack or spicier cheese blend. Taste as you go and start with a small amount of heat, then adjust to your liking. Balance the heat with cool toppings or a dollop of crema to keep the filling enjoyable for everyone.
Vegetarian Options
Swap in a crumbled veggie burger or sautéed mushrooms and onions for a meatless version. Season well so the filling remains flavorful without meat. Make sure the cheese you choose melts nicely with the veggie components for a satisfying bite.
Using Different Cheeses
Experiment with cheddar, Swiss, mozzarella, or pepper jack, or blend a couple for more flavor depth. Softer cheeses melt quickly and create a gooey center, while firmer cheeses add structure. Taste as you go and aim for a balanced melt that doesn’t squeeze out of the pocket.
Tips for Best Results
Sealing the Pockets Well
Press the edges firmly and crimp or pinch to form a tight seal. A good seal prevents leaks during baking and keeps the filling contained. If you see any gaps, pinch them again and consider a light egg wash along the seam to help it set.
Preventing Sogginess
Drain any moisture from toppings and avoid overfilling the pockets. Bake on a parchment-lined sheet to keep the bottoms crisp. Let the pockets rest a few minutes after baking to help the filling set and reduce steam from making the crust soggy.
Making Ahead and Freezing
You can freeze baked pockets or assemble and freeze before baking. For freezing, wrap each one individually and store in a freezer bag. Thaw overnight in the fridge before baking, or bake from frozen, adding a few extra minutes. Label with the date and use within a few months for best texture.
Reheating Tips
Reheat in a 350°F (175°C) oven or a 190°C air fryer until hot and crisp again. Avoid reheating in the microwave if you want to keep that crust nice and crispy. Heat until the filling is steaming hot, about 5–10 minutes depending on size.
Video: CRISPY CHEESEBURGER POCKETS
FAQ – Cheeseburger Pockets
Common Cheeseburger Pocket Questions
Q: Can I freeze them before baking or after cooking?
A: Yes—both options work. If freezing unbaked, bake from frozen, adding a few extra minutes; if freezing baked, reheat until hot inside and crisp on the outside.
Q: What dough works best?
A: Store-bought dough is fastest, but homemade dough yields richer flavor and texture.
Q: How can I prevent the pockets from bursting?
A: Do not overfill, seal edges well, and bake at a steady temperature with even spacing.
Q: Is it safe to serve straight from the oven to kids?
A: Yes, but let them cool briefly to prevent burns and offer bite-sized portions.
Q: Can I make them vegan?
A: Use plant-based meat substitute and a cheese-free option with a flavorful vegan melt or sauce.
Q: How do I know they’re done?
A: The crust is golden, the cheese is melted, and the interior reads at least 160°F (71°C).
Conclusion
When your Cheeseburger Pockets come out of the oven, they’ll be golden brown with that unmistakable smell of melted cheese wafting through the kitchen. The crust should be slightly crisp, while the filling remains warm and juicy on the inside. It’s almost impossible not to dig in right away! I hope this dish brings a bit of joy to your table and makes your dinner routine easier. Give it a try – you might be surprised how simple and satisfying this recipe can be on a busy weeknight.