

Cheeseburger Pretzel Bombs used to be these fancy snacks I thought were only for special occasions. After some serious kitchen testing and a few burnt dough disasters, I’ve nailed down a recipe that works wonderfully for busy weeknights or easy gatherings. They give you all the best parts of a cheeseburger in one delightful bite, and trust me, they’re shockingly simple. The prep is straightforward, and the results are always a hit. You might just find these bombs becoming the star of your next dinner party or game night!

Recipe Card – Cheeseburger Pretzel Bombs
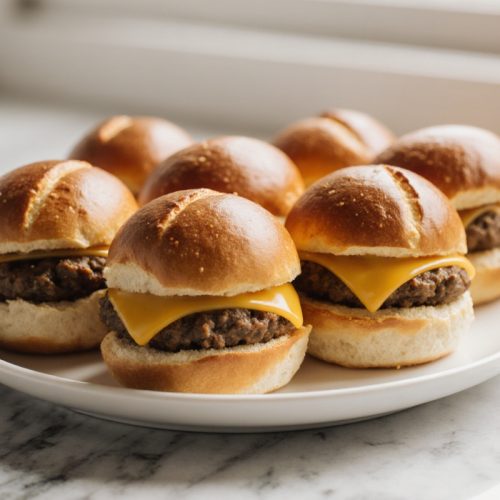
Cheeseburger Pretzel Bombs
Equipment
- Baking Sheet
- Wide pot
- Tongs
- Pastry brush
- Meat Thermometer
- Mixer or whisk
Ingredients
Ingredients
- 500 g Ground beef well-seasoned
- 200 g Cheese sliced for filling
- 300 g Pretzel dough for wrapping
- 15 g Baking soda for boiling water
- 1 ea Egg for egg wash
- 5 g Coarse salt for finishing
Instructions
- Preheat the oven to 175–190 °C. Start by portioning the pretzel dough and shaping it into rounds.
- Spoon ground beef and a slice of cheese into the center of each dough round and seal them securely.
- Boil each bomb in simmering water with baking soda for 30–60 seconds, then place them on a lined baking sheet.
- Brush sealed bombs with egg wash and sprinkle with coarse salt before baking.
- Bake for 12–18 minutes until golden brown and the internal temperature reaches 74 °C.
- Let rest a few minutes before serving warm with desired dips.
Notes
Keep the Flavor Going: More Recipes You’ll Love.
Garlic Parmesan Chicken Pasta recipe
Homemade Butter Chicken Recipe
Or go to my Pinterest.
What Are Cheeseburger Pretzel Bombs?
Why This Recipe Took Off
Cheeseburger Pretzel Bombs are a fun and tasty treat that brings together the juicy goodness of a cheeseburger with the delightful charm of pretzel crust. Picture this: bite-sized pockets wrapped in pretzel dough, filled with savory beef and gooey cheese, then baked to a beautiful golden finish. It’s a dish that impresses on a party spread but is easy enough for home cooks to whip up. I’ve watched this recipe create joyful moments in kitchens because it combines two beloved flavors in one convenient bite.
The magic of this recipe lies in the contrast of a tender, beefy center and a slightly crispy, seasoned pretzel crust. The filling stays juicy inside, and the outside develops a satisfying crunch. If you’re in the mood for something cozy that also wows, Cheeseburger Pretzel Bombs are the way to go. I promise, this little trick makes the crust and filling balance just right.
Perfect For Parties & Gatherings
This dish is a fantastic choice for parties or game days since it’s easy to portion and share. Plan on serving 4–6 bombs per guest as a filling appetizer, or arrange a larger platter for a laid-back buffet. You can prep ahead of time by assembling the fillings and wrapping them in dough hours before baking, finishing them up just before your guests arrive.
Another great thing is the variety in how to present them. Serve them warm with a trio of dips—like mustard, ketchup, and a zesty sauce—to satisfy different taste preferences. These bombs bake quickly, so you can keep everyone happy without spending the entire party in the kitchen. I’ve had gatherings where these were the first to disappear, and my guests came back for seconds, sharing smiles and excited comments. If you’re hosting, they make for a fun and comforting centerpiece.
Ingredients & Nutrition Breakdown
Complete Ingredient List
The ingredient list focuses on three main components: the pretzel dough exterior, a flavorful beef filling, and the melty cheese that ties everything together. You’ll want well-seasoned ground beef for a rich taste, along with cheese that melts nicely and adds creaminess. Pretzel dough or a similar dough with that pretzel flavor is key for achieving that classic crust. Optional seasonings and toppings like garlic, onion powder, sesame seeds, or coarse salt can add the finishing touch.
For a balanced dish, consider using lean beef or adding some finely chopped pickles for a nice zing. If you’re looking for a vegetarian option, you can experiment with plant-based fillings that mimic the texture of beef using spices and mushrooms. The goal is to keep the filling shaped well inside the dough while ensuring it remains juicy after baking. The exact amounts will depend on how many you want to make, but the mixture should be flavorful enough to shine against the pretzel crust.
Nutritional Information Per Serving
Nutritional values will change based on the specific ingredients you choose and portion sizes. Generally, you get a good amount of protein from the beef and cheese, plus some satisfying carbs from the pretzel dough. If you’re keeping an eye on your macros, adjust the recipe by selecting leaner beef, lighter cheese, or smaller portions of dough. Pair these bombs with a fresh salad or steamed veggies for a more balanced meal.
Ingredient Swaps
If you feel like mixing it up, you can swap turkey or plant-based burger crumbles for the beef, or try a different cheese that melts well, like provolone or mozzarella. For a gluten-free version, look for gluten-free pretzel dough or use another gluten-free wrapper for the filling. You can also play with seasonings—adding garlic powder, smoked paprika, or a pinch of chili flakes for some heat can really spice things up. These substitutions let you customize flavors while keeping the overall idea intact.
Step-by-Step Preparation Guide
Essential Equipment
Having the right tools makes everything smoother. A sturdy baking sheet lined with parchment paper is a must for easy removal and cleanup. A wide, shallow pot is great for the pretzel boil, and remember to grab tongs to handle those hot bombs safely. A pastry brush comes in handy for brushing on a light egg wash for that glossy finish, and a meat thermometer is a smart way to ensure everything is cooked properly.
A good mixer or a sturdy whisk will help with the dough, though you can always mix by hand if that’s more your style. Keep a set of shallow bowls ready for your ingredients—one for the beef filling, one for cheese, and one for the dough portions. Having everything prepped and close at hand reduces the stress of multitasking and helps you stay on track.
Assembly Instructions
Begin by portioning the dough and shaping it into small rounds for the bomb exterior. Spoon a generous amount of the seasoned beef filling into the middle of each dough round, then add a slice of cheese before sealing the dough securely around the filling. Make sure there are no gaps to avoid leaks during baking. If you’re new to this, practice wrapping a few test bombs to get a feel for the dough and sealing technique.
Try to keep the sizes uniform so they cook evenly. A slightly thicker dough shell gives you a crisper crust, while a thinner shell allows the filling to shine. Brush each sealed bomb lightly with an egg wash for a glistening, golden finish. The better you seal them, the less likely they are to leak during boiling or baking.
The Pretzel Boil Process
Boiling the pretzel-wrapped bombs before baking is crucial for that authentic pretzel texture. Gently lower the bombs into a pot of simmering water with a bit of baking soda for 30–60 seconds on each side. This quick boil helps set the dough’s surface, giving it that chewy, pretzel-like bite after baking. Remove them carefully with tongs and place them on the prepared baking sheet.
After boiling, double-check that the bombs are well sealed. If any seams opened, pinch them closed again before baking. A sprinkle of finishing salt during this stage adds that classic pretzel flavor that really shines once they’re baked.
Baking & Finishing Touches
Bake the bombs at a steady temperature until the crust is golden and shiny—usually around 12–18 minutes depending on their size. You’re aiming for an internal temperature of 165 °F (74 °C) for the beef filling to make sure it’s safe to eat. Keep an eye on the color; you want a rich crust without burning. Allow the bombs to rest for a moment after pulling them from the oven so the cheese can settle.
For a finishing touch, lightly brush with melted butter and a sprinkle of coarse salt while they’re warm for that extra pretzel-soft bite. If you prefer a crisper exterior, give them another quick bake on a rack for 2–3 minutes to maximize air circulation. Serve them warm while the cheese is gooey and the crust has that classic chew.
Expert Tips & Common Mistakes
Avoiding Dough Tears
A common issue is dough tearing while sealing. Keep the dough portions small and uniform, and avoid overworking the dough. If you notice tearing, lightly moisten the edges with water and pinch them back together. Letting the dough rest briefly before shaping can also help it relax and seal properly.
If your dough is too stiff, give it a few minutes to rest. Patience here will lead to a tighter seal that won’t tear during boiling or baking. Trust me—I’ve had my share of learning experiences. Rest time is your friend!
Preventing Filling Leaks
Leaks often happen when the seams aren’t sealed well or when the filling is overstuffed. Use just enough filling to create a pleasing pocket without overflowing. Make sure to seal all openings securely and practice your pinching technique to keep the dough intact throughout the boiling process. A well-sealed bomb holds its shape and stays juicy inside.
If a bomb leaks during boiling, don’t stress—just wipe away any escaping filling from the water and set it back on the sheet, resealing as needed. It’s a quick fix that can save the batch!
Getting the Perfect Crust
For that classic pretzel crust, you can’t skip the boiling step. The baking soda bath gives pretzels their signature chewy texture. After boiling, ensure the bombs are evenly dry before baking to prevent steaming and sogginess. A light egg wash also helps achieve a glossy finish.
If you want extra shine, sprinkle some coarse salt right before baking. For an even stronger pretzel flavor, brush them with a little melted butter after baking while they’re still warm.
Timing & Temperature Guide
Keep your oven set to a steady 350–375 °F (175–190 °C). Larger bombs will take closer to 18 minutes, while smaller ones will finish around 12 minutes. Use a meat thermometer to check that the beef has reached 165 °F (74 °C). Don’t rush the boil or bake—taking your time will pay off with a better crust and juicier filling.
I’ve found that keeping a consistent oven temperature and spacing the bombs evenly on the sheet gives you the best results. If you notice undercooked centers or uneven color, rotate the pan halfway through baking.
Variations & Flavor Combinations
Regional Twists
Try adding some regional flair to your filling—maybe a hint of pickled jalapeño for a kick, or paprika and mustard powder for a more unique twist on classic burger flavors. Cheddar, Swiss, and pepper jack cheeses all bring their own melting qualities and tastes, so feel free to adjust the bomb to your guests’ preferences. If you’re feeling adventurous, some smoky bacon bits can deepen the savory profile.
You could also fold in caramelized onions for sweetness or sautéed mushrooms for an earthy touch. The filling is your canvas—mix in classics or bold flavors to keep it interesting!
Sauces & Dipping Choices
The right dipping options elevate the experience. A tangy mustard-dill sauce, a creamy mayo-based burger sauce, or a zesty ketchup-mayo blend can all work wonders. Consider adding a warm cheddar dip or a BBQ sauce for a deeper, savory finish. It’s nice to have a few options on the side so guests can customize their bites.
If you’d rather keep it straightforward, a single, well-balanced sauce that matches the burger flavors should please most taste buds. The goal is to offer variety without complicating things too much.
Make-Ahead & Storage
If you want to prepare ahead of time, assemble and refrigerate the bombs before boiling for up to 8–12 hours. When it’s time to serve, just boil and bake them fresh, or freeze unbaked bombs on a sheet, then transfer them to a bag for longer storage. Bake from frozen, adding a few extra minutes to ensure they heat through and the crust turns golden.
For leftovers, reheat gently in a 350 °F (175 °C) oven until warmed through to keep that crust crispy. If you’re freezing them, label with the date and use within 1–2 months for the best texture and flavor.
Video: Cheesy Pretzel Venison Burger Bombs! | Great Lakes Country
FAQ – Cheeseburger Pretzel Bombs
What can I do if the dish turns out too dry?
Next time, try adding a bit more fat, like cheese or a touch of butter, or cut down the baking time by a minute or two. You can also check halfway through and adjust the moisture if it looks like it’s drying out.
Can I make these ahead of time?
Absolutely! You can assemble the bombs and refrigerate them for up to 12 hours before boiling and baking. If you want to freeze them, just assemble, then freeze unbaked on a sheet and transfer to a bag. Bake from frozen, adding a few minutes to the time.
How do I prevent the filling from leaking out?
Make sure to seal the dough firmly around the filling and avoid overstuffing each bomb. If you do get a leak, don’t stress! Just wipe any filling off the water and place it back on the baking sheet, resealing if needed.
Conclusion
When you take these Cheeseburger Pretzel Bombs out of the oven, they’ll be golden brown and inviting, with that irresistible aroma wafting through your kitchen. The first bite offers a satisfying crunch followed by a warm, cheesy explosion that feels like a cozy hug. They’re not just great for parties; they can easily become a weeknight favorite! Trust me, you can do this. Give it a try – you might be surprised how simple and satisfying this recipe can be on a busy weeknight.