
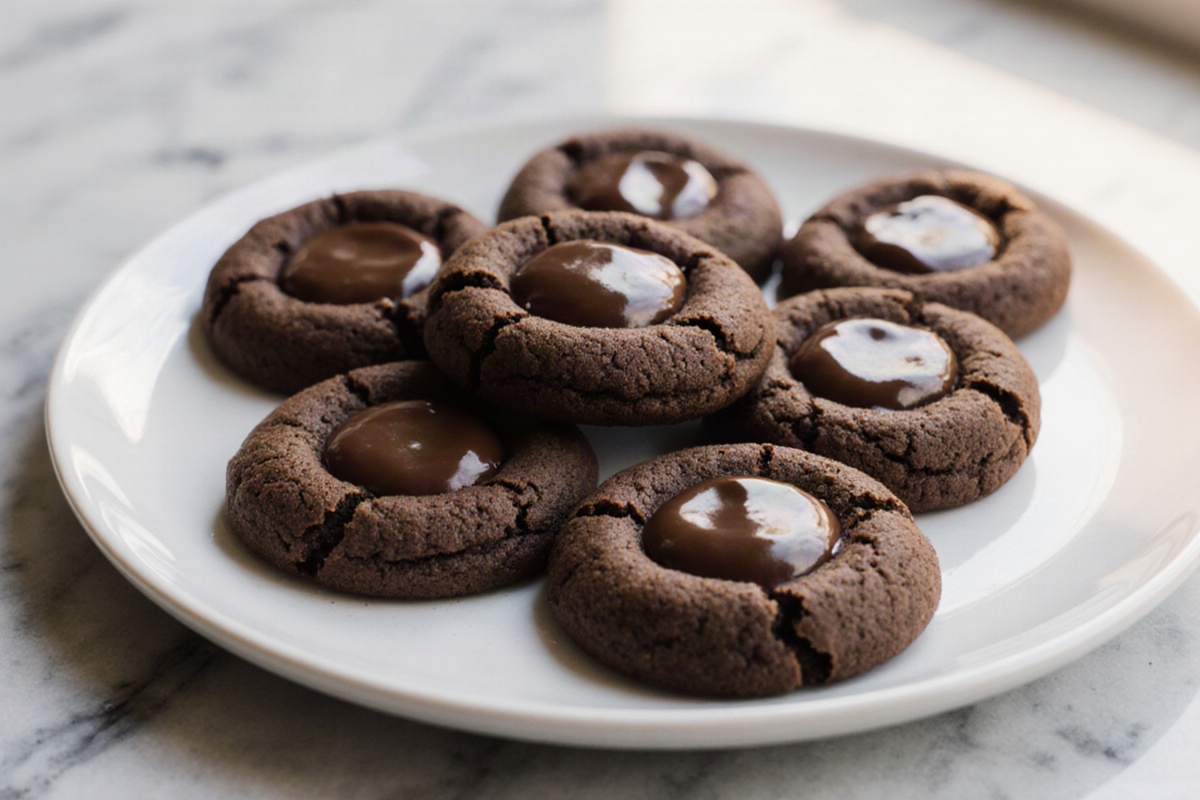
Chocolate Thumbprint Cookies used to feel fussy and tricky to me, often leading to a few batches that were more ‘thumbprint’ than ‘cookie.’ After trying different techniques, I’ve nailed down a straightforward approach that fits perfectly into a busy weeknight. The ingredients are simple, the steps are quick, and the delicious results will impress your family or guests. You’ll love how easy it is to customize the fillings, too. Give it a shot – it might just become your go-to treat.

The perfect treat for chocolate lovers!
Recipe Card – Chocolate Thumbprint Cookies

Chocolate Thumbprint Cookies
Equipment
- Mixing Bowl
- Baking sheets
- Parchment paper
- Oven
- Air Fryer
Ingredients
Ingredients
- 200 g Butter softened
- 200 g Sugar
- 1 Egg
- 300 g Flour
- 50 g Cocoa powder
- 1 g Salt
- 5 ml Vanilla extract
- 100 g Filling such as ganache, fruit jam, or caramel
Instructions
- Start by preheating your oven to 175 °C and lining two baking sheets with parchment paper.
- Cream softened butter with sugar until it’s pale and fluffy, then mix in an egg and vanilla.
- In another bowl, whisk together flour, cocoa, and salt, then gradually mix that into the butter mixture until you form a soft dough.
- Roll the dough into small balls and place them on the sheets. Press your thumb into the center of each cookie.
- Bake for 9–12 minutes until the edges look set but the centers are still slightly soft.
- Let them cool completely before filling to prevent filling from oozing out.
Notes
What Are Chocolate Thumbprint Cookies?
Flavor and Texture Profile
Chocolate Thumbprint Cookies offer a delightful combination of textures and a rich chocolate flavor. The cookie base features a soft, slightly chewy dough that has a hint of butter, which crisps at the edges as it bakes. I leave a little hollow in the center so I can add a filling, creating a wonderful contrast between the crispy edges and a gooey, flavorful center. When you bite into them, you’ll savor the deep chocolate aroma, a splash of vanilla, and the sweetness of the filling balancing the cocoa. I’ve burned a batch or two in my eagerness, so trust me: a slow bake that keeps the centers tender is worth the wait. For best results, look for a light crack on top and a center that’s set but still gives a little when you press your thumb—this makes for that classic thumbprint look.
Popularity in the USA
In the United States, Chocolate Thumbprint Cookies are a beloved holiday treat and a versatile option all year long. Families adore them for their forgiving dough, which easily adapts to different flavors and fillings, allowing them to shine with minimal effort. They’re perfect for cookie trays, potlucks, and bake sales since they travel well and look fancy without the need for complicated decorating or piping. The thumbprint concept invites creativity: swap out jams, caramels, or ganache flavors to fit the season or occasion. As a chef who values approachable cooking, I can confidently say these cookies spread joy at any gathering, and the simple act of pressing the centers creates a fun, hands-on moment that everyone, young and old, enjoys.
Ingredients You Need
Classic Ingredients
The heart of Chocolate Thumbprint Cookies lies in a short, tender dough made from everyday pantry staples. You’ll typically start with butter for richness, sugar for balance, and flour to hold it all together. Cocoa powder or melted chocolate gives that deep chocolate flavor, while a splash of vanilla brings everything to life. A bit of salt enhances the flavors, and one or two eggs help bind the dough so it keeps its shape. This combination yields a dough that’s easy to roll and maintains its form on the baking sheet, puffing just enough to create a shallow well for filling. For the best results, use quality cocoa or real melted chocolate so the flavor shines through instead of tasting burnt from overbaking.
Best Filling Options
The filling really makes the Chocolate Thumbprint Cookies stand out, and there are so many popular options. A smooth ganache made from chocolate and cream creates a rich, melt-in-your-mouth center. Fruit jams, especially raspberry or strawberry, add a bright contrast to the dark cocoa. Caramel or salted caramel offers a chewy, buttery bite that’s hard to resist. For a lighter option, lemon curd or ricotta-based cream provides tang and creaminess without overwhelming the chocolate base. Whatever you choose, stick to a small amount—about 1/2 to 1 teaspoon per thumbprint—so the center stays neat and the cookie doesn’t collapse. I like to prepare a variety of fillings so guests can mix and match.
Easy Substitutions
If you need to adjust the recipe, there are friendly substitutions that keep the cookies tasty. For a dairy-free version, use a neutral oil or dairy-free butter along with a bit more vanilla to maintain richness. If you want a gluten-free option, try a reliable gluten-free flour blend and add a little extra moisture if the dough feels dry. You can swap dark cocoa for regular cocoa and toss in some chocolate chips for a fun texture. If you’re looking for a quicker route, skip the filling and simply dust with a light glaze or powdered sugar instead, although this changes it up from the classic.
How to Make Chocolate Thumbprint Cookies
Step-by-Step Preparation
Start by preheating your oven to 350 °F (175 °C) and lining two baking sheets with parchment paper. Cream softened butter with sugar until it’s pale and fluffy, then mix in an egg (or two yolks for richness) and vanilla. In another bowl, whisk together flour, cocoa, and salt, then gradually mix that into the butter mixture until you form a soft dough. If it’s very soft, chill the dough briefly, then roll it into small balls and place them on the sheets. Press your thumb into the center of each cookie; if the dough feels too soft, chill it for 10 minutes and then try again. Bake for 9–12 minutes until the edges look set but the centers are still slightly soft. Let them cool completely before filling, so the centers don’t crack or let the filling ooze out.
Air Fryer Instructions
Air frying is a great alternative when you’re short on oven space. Preheat the air fryer to 320 °F (160 °C). Place the dough balls in a parchment-lined tray or basket, leaving space for them to expand, and cook for 7–9 minutes, keeping an eye on the edges for a light crust. Press the centers while they’re still warm to maintain the well, then cool on a rack before adding filling. If your air fryer tends to run hot, reduce the cooking time by a minute or two to prevent over-browning. Using parchment helps with cleanup and stops sticking, keeping the centers tidy for filling.
Oven-Baking Alternative
If you prefer the traditional bake, use the same dough and preheat to 350 °F (175 °C). Shape the cookies on a parchment-lined sheet and bake for 9–12 minutes, depending on your oven’s quirks. The tops should be set with a slight crack, but the centers should remain soft when pressed. Remove and let cool completely before filling to prevent hot centers that could crush the indentation. For evenly baked cookies, rotate the sheets halfway through baking and be gentle when forming the thumbprint to avoid cracks.
Tips, Mistakes, and Troubleshooting
Preventing Spreading
If you notice the cookies spreading too much, it’s likely due to warm dough or too much moisture. Chill the dough for at least 15 minutes before shaping, and make sure your butter is soft but not melted. Bake on parchment, so the bottoms don’t stick to the sheet, and avoid overcrowding the pan. If spreading happens while baking, you can re-chill the dough balls briefly or reshape the indentations after they’ve begun to set. A calm, steady approach helps keep their classic round shape.
Keeping Centers Neat
The hallmark of a good thumbprint cookie is a neat, well-defined center. Gently press with your thumb while the dough is warm and slightly flexible, not when it’s cold and stiff. If the dough collapses, you can reshape the indent with a clean finger or the end of a spoon after taking them out of the oven, then pop them back in to bake briefly again. Let the cookies cool completely on a rack before filling; this helps prevent the centers from becoming messy and ensures the filling sets properly. A little tilt or off-center indentation can still be charming, but try for symmetry when you can.
Storing and Freezing
Store unfilled cookies in an airtight container at room temperature for up to 3–4 days. If you want to store for longer, freeze the dough balls before baking for up to 2 months, then bake from frozen with a slight increase in time. Baked cookies can be kept in an airtight container for about a week, but I suggest avoiding freezing already-filled cookies unless you’re using fillings that freeze well. When you’re ready to serve, fill the centers and keep them at room temperature for a soft, inviting texture. Remember to refrigerate any fillings needing it and let them come to room temperature before serving for the best flavor.
Variations, Serving Ideas, and FAQ
Holiday and Seasonal Variations
Change things up for the holidays by adding a pinch of cinnamon or chili powder to the dough for warmth, or drizzle white chocolate over the finished cookies for a festive touch. For seasonal flair, fill with cranberry-orange jam in winter or strawberry basil jam in summer. A light dusting of powdered sugar gives a delightful finish. You can also swap the filling to peppermint ganache during the winter months for a refreshing bite.
Serving Suggestions
These cookies pair wonderfully with a cold glass of milk, coffee, or tea. They also make a lovely serving alongside a fruit preserve board or a simple yogurt dip. For a more indulgent treat, serve warm with a scoop of vanilla ice cream and a drizzle of chocolate sauce. Adding fresh berries on the side adds a lovely contrast to the richness of the chocolate. They even pair well with a light green salad if you’re balancing a larger dessert spread.
Common Questions
- Can I freeze the dough? Yes, you can freeze the formed dough balls for up to 2 months and bake from frozen with a few extra minutes.
- Do I need eggs? Eggs help with binding and texture; you can use flax eggs as a substitute, but the results may vary.
- How long do fillings last? Fillings like ganache or jam stay fresh for a few days in the fridge; bring them to room temperature before serving. If the filling thickens, warm it slightly to loosen it, but avoid overheating the centers.
Video: Chocolate Thumbprint Cookies Recipe
FAQ – Chocolate Thumbprint Cookies
Can I freeze the dough?
Yes, you can freeze the formed dough balls for up to 2 months and bake from frozen with a few extra minutes.
Do I need eggs?
Eggs help with binding and texture; you can substitute with flax eggs if needed, but results may vary.
How long do fillings last?
Fillings like ganache or jam keep best for a few days in the fridge; bring to room temperature before serving. If the filling thickens, warm it slightly to loosen, but avoid overheating the centers.
Conclusion
When those Chocolate Thumbprint Cookies are done, you’ll see their golden edges and slightly cracked tops inviting you in. The aroma of chocolate fills the kitchen, and they feel soft yet firm in your hands. Once you add your filling, you’ve got a treat that’s as enjoyable to look at as it is to eat. Seriously, if you’re looking for something that’s easy, delightful, and will impress anyone who tries them, you’re in the right place. So, roll up your sleeves and give these a try – I promise, you’ll be pleasantly surprised by how simple and rewarding they can be.