
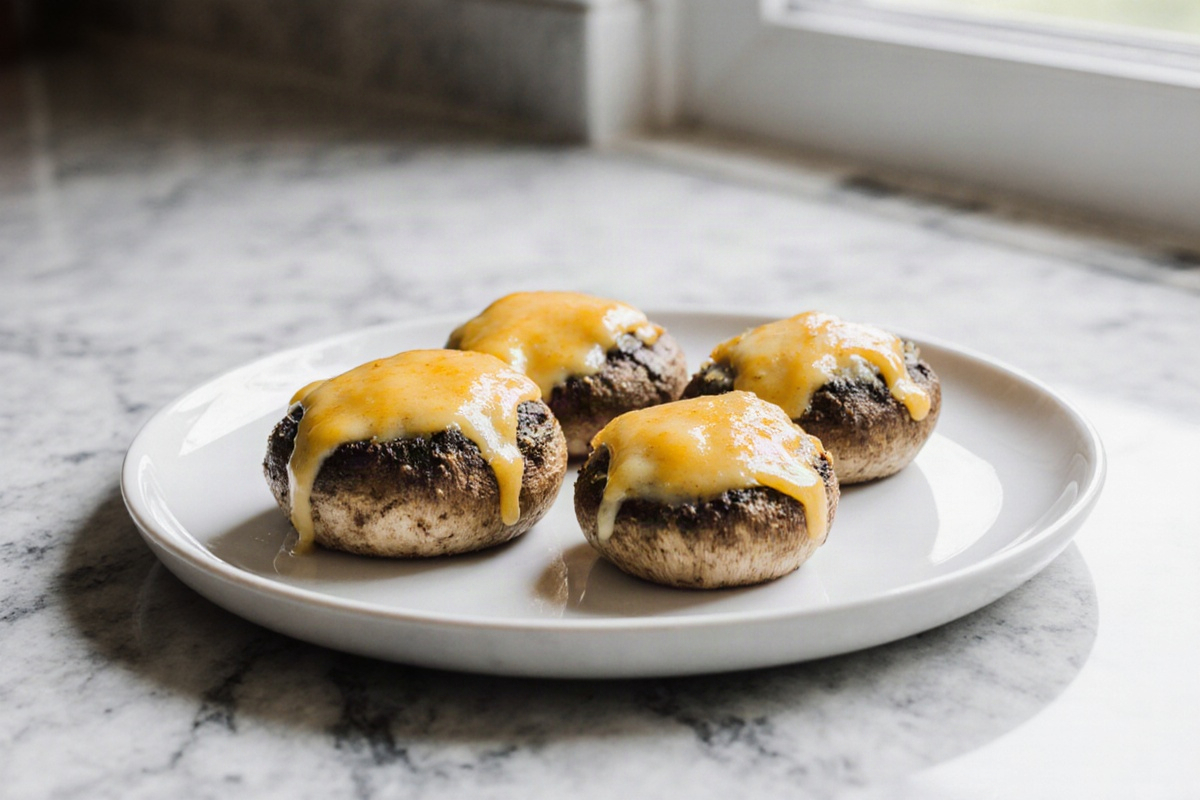
Cheesy Mushrooms in Air Fryer used to be my go-to dish for entertaining, but let me tell you, I’ve flopped a couple of times with burnt cheese and soggy mushrooms. Thankfully, I’ve cracked the code to a reliable way that’s perfect for a busy weeknight or just snacking while binge-watching your favorite show. With simple steps, quick prep, and ingredients you probably already have, these cheese-filled beauties will impress you every time. Plus, there’s barely any cleanup involved. Give it a shot, and you might just have a new favorite on your hands.
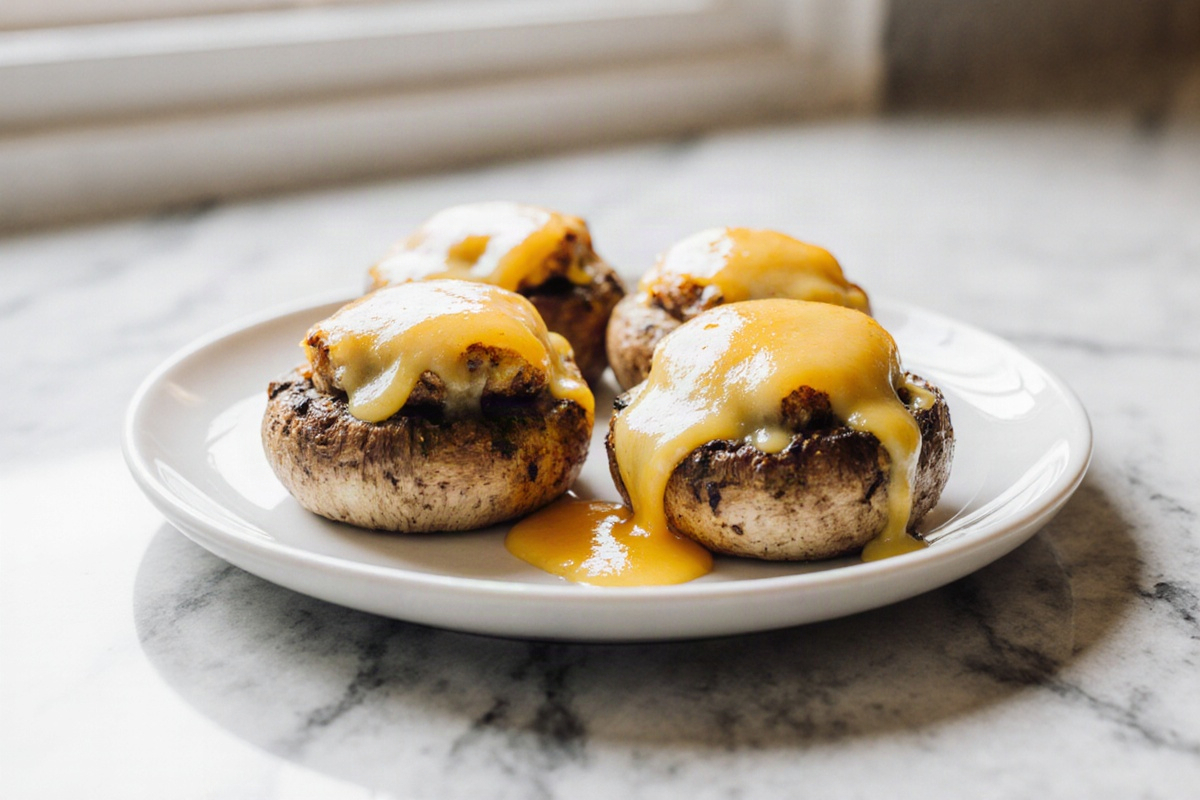
Get ready to indulge in these cheesy delights!
Recipe Card – Cheesy Mushrooms in Air Fryer
Cheesy Mushrooms in Air Fryer
Equipment
- Air Fryer
- Mixing Bowl
- Paper towels
Ingredients
Ingredients
- 250 g Mushrooms button or cremini, cleaned and trimmed
- 15 ml Olive oil for browning, optional
- 100 g Cheese mozzarella, cheddar, or your choice
- 1 g Garlic powder to taste
- 1 g Salt to taste
- 1 g Black pepper to taste
Instructions
- Start by cleaning the mushrooms with a damp paper towel to remove any dirt; never soak them, as water will make them soggy.
- Pat the mushrooms dry, then toss them with the oil, garlic powder, salt, and pepper.
- Place the mushrooms in a single layer in the air fryer basket.
- Air fry at 190°C for about 10 minutes, shaking the basket halfway through for even cooking.
- When golden, sprinkle the cheese over the mushrooms and cook for an additional 2-3 minutes until melted.
Notes
Cheesy Mushrooms in Air Fryer
Why This Recipe Works
Cheesy Mushrooms in Air Fryer offer a simple and satisfying bite every time. The air fryer circulates heat to crisp the mushroom caps quickly while locking in their natural umami, giving you nice browning without the deep-frying mess. A bit of oil helps with surface browning, but feel free to skip it if you’re keeping an eye on fat. The cheese melts deliciously into the mushroom caps with a cozy, melty finish that’s perfect for a party snack or a quick side.
This method is forgiving and fast, which is why I always come back to it. You can switch up the mushrooms and cheeses based on what you have on hand, plus there’s not a ton of prep involved. Trust me, this quick method is a reliable way to get restaurant-like flavor at home. I’ve burned a batch or two myself, so I understand the temptation to rush, but being patient and keeping everything in a single layer makes all the difference. This method also helps you get to that crispy, melty goodness in your own kitchen.
Ingredients You Need
The key ingredients are simple: mushrooms and cheese. You’ll also want a light coating of oil or melted butter for browning, plus a bit of garlic or garlic powder for aroma, and salt and pepper to taste. Optional add-ins like herbs or a splash of lemon can brighten things up. The exact amounts aren’t critical here since this recipe thrives on balance rather than strict measurements.
For best results, pick mushrooms that feel firm and are free of moisture. Button or cremini mushrooms work well, while you can slice portobello caps into bite-sized pieces for a heartier snack. When it comes to cheese, good melting varieties like mozzarella, cheddar, or a soft cream-cheese blend are excellent choices; finishing with parmesan adds a nice sharp finish. If you’re looking for a vegan option, swap in a dairy-free cheese and adjust the salt according to your taste. The beauty of this recipe lies in how easy it is to customize based on what you have in your fridge.
Best Mushrooms and Cheese Choices
The best mushrooms for this are those with sturdy caps that brown nicely and hold up to the air fryer heat. Button or cremini mushrooms are solid picks, and sliced portobello caps can give a more substantial bite. Avoid any mushrooms that look slimy or soft, as they can hinder that crispness. When choosing cheese, opt for varieties that provide both creaminess and flavor. Fresh mozzarella melts beautifully but can become a bit stringy; cheddar offers a rich bite; parmesan gives a salty finish, and soft feta can enhance Mediterranean flavors. For a lighter option, you can mix mozzarella and parmesan. If you’re looking for lactose-free, find a good plant-based cheese that shreds well and holds moisture.
Consider finishing with a light sprinkle of herbs like parsley or chives for color. A touch of grated garlic or chili flakes can elevate the dish without overwhelming the mushrooms’ natural flavor. The key is to pick cheeses that melt smoothly and won’t separate when heated.
How to Make Cheesy Mushrooms
Prepare the Mushrooms
Start by cleaning the mushrooms with a damp paper towel to remove any dirt; never soak them, as water will make them soggy. Trim the stems if needed and slice into uniform pieces so they cook evenly. Pat the mushrooms dry after washing; moisture is the enemy of crispiness. A light toss with a small amount of oil or melted butter, plus a pinch of salt, helps deepen their flavor and promote browning. For an extra boost of aroma, add a sprinkle of garlic powder or your favorite dried herbs. The idea is to dry the mushrooms on the surface and season them well so the heat from the air fryer can work its magic.
Place the pieces in a single layer in the air fryer basket or tray, making sure there’s enough space for the air to circulate. If you have a lot, you might need to work in batches to avoid overcrowding, which leads to steaming instead of browning. Preheating isn’t a must for many models, but a quick warm-up can help get that sizzle you want.
Air Fry Until Golden
Put the seasoned mushrooms in a single layer in the air fryer and cook until the edges are golden and the centers are tender. A light spray of oil on top helps get that crisp edge without making a mess in the kitchen. Avoid stacking the pieces; air needs to circulate around every surface. Halfway through, give the basket a quick shake or flip to promote even browning. Keep an eye out for darker edges toward the end; overcooking turns mushrooms tough instead of crispy. The goal is a crisp cap with tender insides, not a shriveled bite. If your model runs hot, you might want to shorten the cooking time slightly and keep an eye on smaller pieces.
If you want a stronger crust, you can toss them lightly with cornstarch or flour before air frying, but this is optional. Remember that different mushrooms have different moisture levels, so the first batch will help you figure out your cooking times.
Add the Cheese and Finish
Once the mushrooms are beautifully browned, sprinkle the cheese evenly over the hot surface. The heat from the mushrooms and the air fryer will begin to melt the cheese quickly, so keep an eye on them to avoid scorching. Pop the tray back into the air fryer just long enough for the cheese to get gooey and lightly golden around the edges. If you prefer a more baked result, let the cheese melt a bit longer, but be careful not to burn it. A light touch with fresh herbs or a drizzle of olive oil at the end adds brightness.
This finishing stage locks in moisture and gives you that signature melty cheese bite. It’s the perfect time to switch things up—try adding a sprinkle of pepper flakes, a dusting of parmesan, or a quick squeeze of lemon for added zest. I often remind people that a little cheese goes a long way, so add it in stages and taste as you go.
Tips for Crispy, Flavorful Mushrooms
How to Prevent Watery Mushrooms
Dry mushrooms are the key to a crisp finish. Never wash them under running water; instead, wipe them clean. Pat them completely dry after cleaning and before seasoning. If you notice excess moisture, give the pieces an extra minute on the heat or dry them again with a clean towel. Make sure they’re arranged in a single layer with space between each piece to allow air circulation. Avoid crowding the basket, which traps steam and makes them soggy. A light dusting of cornstarch can help create a crisp crust, but use it sparingly.
To minimize moisture from the start, choose mushrooms that feel firm and dry to the touch. If you notice a lot of water being released during cooking, remove the tray and let it sit for a minute before continuing. These small steps keep the exterior crisp while maintaining a tender interior.
How to Keep Cheese From Burning
Cheese can burn quickly when exposed to high heat, so timing is key. Add the cheese toward the end of the cooking cycle, or opt for cheeses that melt well at lower temperatures. If you’re using a strong, sharp cheese, balance it with milder melts to prevent burnt edges. A light sprinkle of cheese at different stages helps build a gooey, even layer instead of a burnt top. Think about finishing with fresh herbs or a squeeze of lemon to cut through any richness.
Keep a close watch during the last couple of minutes, especially with thinner slices or small mushrooms. If you see signs of browning too soon, reduce the heat slightly or remove the tray briefly to lower the temperature before continuing.
Cooking Time for Different Mushrooms
Different mushrooms release moisture at varying rates and have different densities, so cooking times will differ. Button and cremini mushrooms typically brown and cook quickly, while portobello caps may need a few extra minutes. Slice sizes matter—smaller pieces crisp faster, while larger ones stay tender inside. If you’re unsure, start with a shorter time and check for tenderness and color; you can always add a few minutes if needed. The goal is evenly browned edges with a tender center, not dryness or a mushy texture.
Keeping these guidelines in mind helps you adapt the method based on what you have while still getting that signature melty cheese finish.
Cheesy Mushroom Variations
Garlic Parmesan
Garlic Parmesan is a fan-favorite twist: mix minced garlic with parmesan and a pinch of parsley for a bright, salty crust. You can combine grated parmesan with a light drizzle of olive oil to help it stick to the mushrooms. The garlic adds warmth, while parmesan provides a savory bite that turns into crispy bits when cooked. Use fresh garlic for bold aroma, but if you’re short on time, a pinch of garlic powder works too. After browning, sprinkle the garlic-parmesan mixture on to let it melt and caramelize slightly, giving you a savory crust. A squeeze of lemon or a drizzle of olive oil brightens the dish.
If you prefer a milder flavor, swap some of the parmesan for mozzarella; this keeps the topping creamy instead of too firm. It’s a classic combination that pairs wonderfully with pasta or a fresh salad.
Bacon Cheddar
For a smoky, indulgent option, crumble cooked bacon and mix it with shredded cheddar. The crispy bacon bits bring texture and salt, while cheddar adds a rich melt that blends nicely with the mushrooms’ earthiness. Start with lightly seasoned mushrooms, then add the cheddar and bacon near the end of cooking so the topping doesn’t burn. Enjoy this option hot so the cheese stays gooey and the bacon stays crisp. If you’re counting calories, you can bake the mushrooms with a light drizzle of oil and skip the bacon, using some smoked paprika for that smoky flavor instead.
This dish pairs well with a fresh green salad or crusty bread for a satisfying small plate. It’s comfort food with a little kick that disappears quickly!
Mediterranean Feta
Crumbled feta with olives, sun-dried tomatoes, and oregano gives a bright Mediterranean twist. The tangy feta softens as it heats, blending beautifully with the mushrooms’ savory flavor. You can top with parsley and a drizzle of olive oil after cooking to finish the dish. For best texture, choose feta that’s not too wet—crumbly feta melts more predictably than wetter kinds. If you’re avoiding dairy, a dairy-free feta substitute that crumbles well works too. A squeeze of lemon livens up the flavors and ties the dish together.
This variation goes perfectly with a cucumber-tomato salad or warm pita. It’s a simple, flavorful way to bring a vacation vibe right to your table.
Spicy Southwestern
Kick things up a notch with a Southwestern flair: chili powder, paprika, cumin, a splash of lime, and fresh cilantro. You can add jalapeño slices for extra heat. The spices complement the earthiness of the mushrooms, and a sprinkle of pepper jack or cheddar melts into a creamy finish. After cooking, finish off with fresh cilantro and a squeeze of lime to really boost the flavors. If you enjoy heat but want more texture, toss in some roasted corn or black beans for a fajita-style bite.
This option works great as a party snack with dipping sauces or as a topping for soft tacos. The bright acidity from lime and zesty spices give you a punch while letting the mushrooms take center stage.
Vegan and Gluten-Free Options
Make it completely plant-based and gluten-free by using a vegan cheese that melts well and selecting gluten-free seasonings. A dairy-free mozzarella or cheddar alternative pairs nicely with the mushrooms. If you’re not using cheese, a drizzle of smoky paprika oil and some nutritional yeast can create a cheesy vibe without dairy. Add some lemon juice or zest for brightness, and finish with herbs to keep the dish feeling fresh. This option is perfect for gatherings with friends who have different dietary needs.
Even without cheese, you can achieve a wonderful result by using a combination of olive oil, garlic, herbs, and a little salt. The trick is to keep the right moisture in the mushrooms so they don’t turn mushy while still achieving a savory, umami-rich finish that everyone will love.
Frequently Asked Questions
Temperature and Timing
Temperature and timing are the two factors that will shape your results. For air-fried mushrooms, a common range is 375-400°F, and the total time depends on their size and thickness; expect a quick cook in the 6-10 minute range. Shake the basket halfway through to promote even browning. If your mushrooms are small or sliced thin, start checking at the 5-minute mark to avoid overcooking. Always trust your instincts: you want crisp edges and tender centers, not dry, shriveled caps. If you’re using larger portobello pieces, they may need a couple of extra minutes to cook through. The goal is a consistent texture across all pieces.
A quick tip: preheating the air fryer can help you achieve a faster, more even crust. If you’re unsure about your timing, start with a shorter time and add a few extra minutes if needed. And remember, don’t overcrowd the basket; air needs to circulate for that signature crisp.
Storage and Reheating
Store any leftovers in an airtight container in the refrigerator for up to two days. Reheat in the air fryer for a brief time, about 2-3 minutes at 350°F, until warm and the cheese is melty again. Reheating in the microwave can make the mushrooms soggy, so I recommend air frying or quickly reheating in a skillet instead. If they seem a touch dry when reheating, dab with a tiny bit of oil or a light sprinkle of water to revive the texture. Keep in mind that you shouldn’t leave mushrooms at room temperature for more than two hours for safety reasons.
For the best results, reheat in small batches to maintain that crisp exterior. If you’re reheating in multiple batches, keep the cheese addition minimal to avoid over-melting and losing structure. Plate and serve right away to enjoy that crispy bite again.
Ingredient Substitutions
You can swap out ingredients based on what you have handy. If you don’t have mushrooms, sliced zucchini or squash can serve as a springy alternative, though the texture will vary. You can replace cheese with dairy-free melts for vegan options or skip cheese altogether for a lighter dish. Omit oil if you’re counting calories, but a little helps with browning. Smoked paprika or chili powder can substitute for fresh garlic for a similar depth of flavor. If you’re avoiding gluten, all standard ingredients here are naturally gluten-free, but be sure to check labels on processed cheeses to play it safe.
Dried herbs like thyme, oregano, or rosemary can substitute for fresh herbs in a pinch. The key is to keep flavors balanced without overpowering the mushrooms’ natural umami. Use your kitchen creativity to adjust for personal taste while keeping the method intact.
Video: Cheesy STUFFED MUSHROOMS Baked In The Air Fryer
FAQ – Cheesy Mushrooms in Air Fryer
How can I prevent soggy mushrooms?
Drying your mushrooms is key! Avoid washing them under running water; instead, wipe them clean with a damp paper towel. Pat them completely dry before seasoning, and remember – moisture is the enemy of crispiness!
What type of cheese works best?
Look for good melting cheeses like mozzarella or cheddar. Parmesan can also add a delicious finish. If you’re vegan, there are great plant-based cheeses that melt nicely too. Just remember that freshness matters!
Can I make these ahead of time?
You can prep the mushrooms, but I recommend cooking them fresh for that perfect crispy texture. If you have leftovers, store them in an airtight container and reheat them in the air fryer for about 2-3 minutes.
Conclusion
Once you’ve made these Cheesy Mushrooms in Air Fryer, you’ll be amazed at how they look—golden brown and beautifully crispy with that melted cheese just inviting you in. The aroma is mouthwatering, and I love that satisfying crunch when you take a bite. Don’t overthink it; just follow the method, and you’ll deliver a restaurant-quality snack from your kitchen. Give it a try – you might be surprised how simple and satisfying this recipe can be on a busy weeknight.