
Brown Butter Dulce de Leche Rive Krispie Treats used to be one of those dishes I only made on weekends because it felt fussy and easy to mess up. After testing different methods, I finally landed on a version that fits right into a busy weeknight. The steps are simple, the ingredients are easy to find, and the result is full of flavor without extra hassle. Once you try this approach, I think it will become a regular part of your dessert rotation too.
Recipe Card – Brown Butter Dulce de Leche Rive Krispie Treats
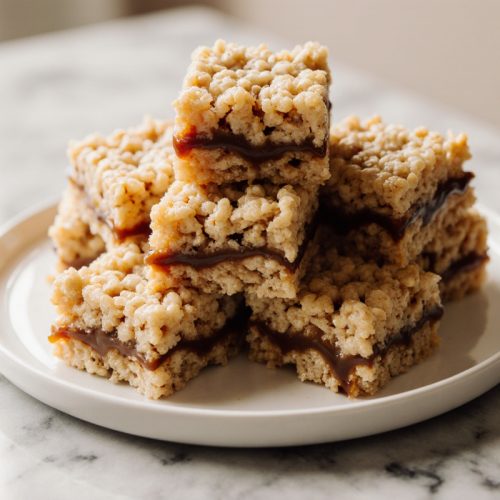
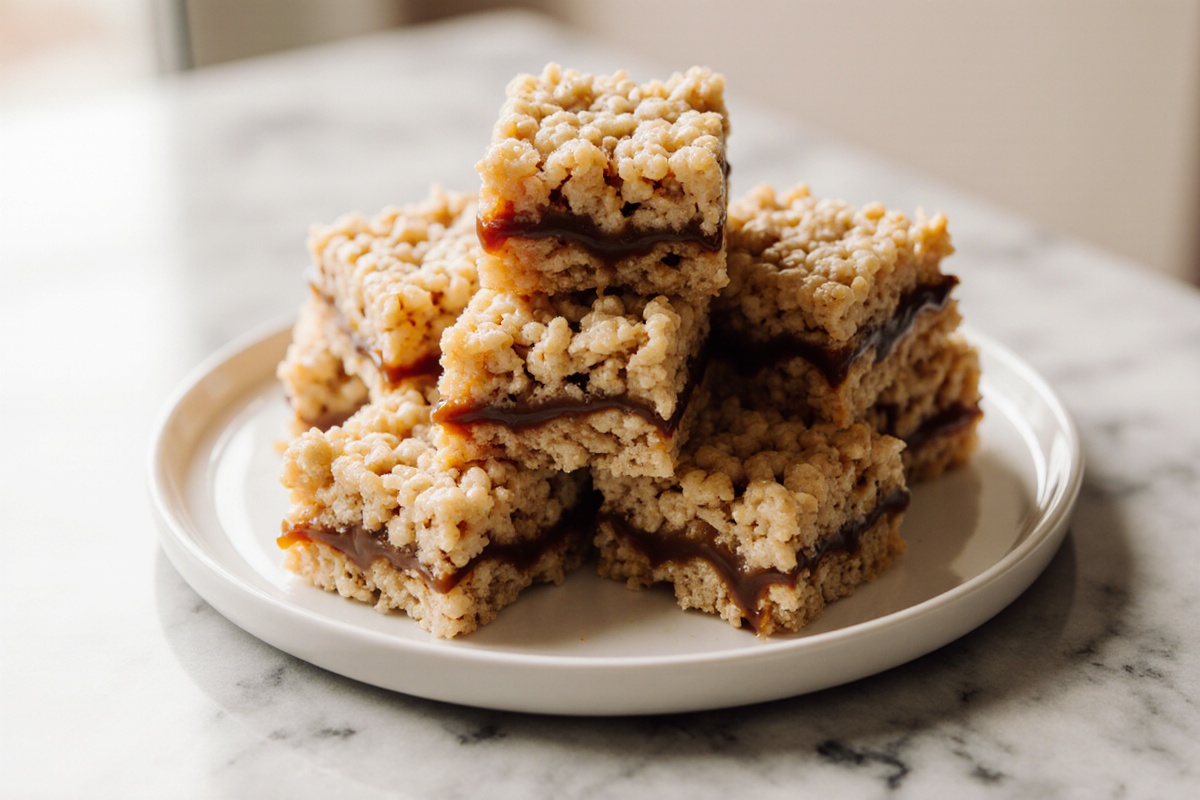
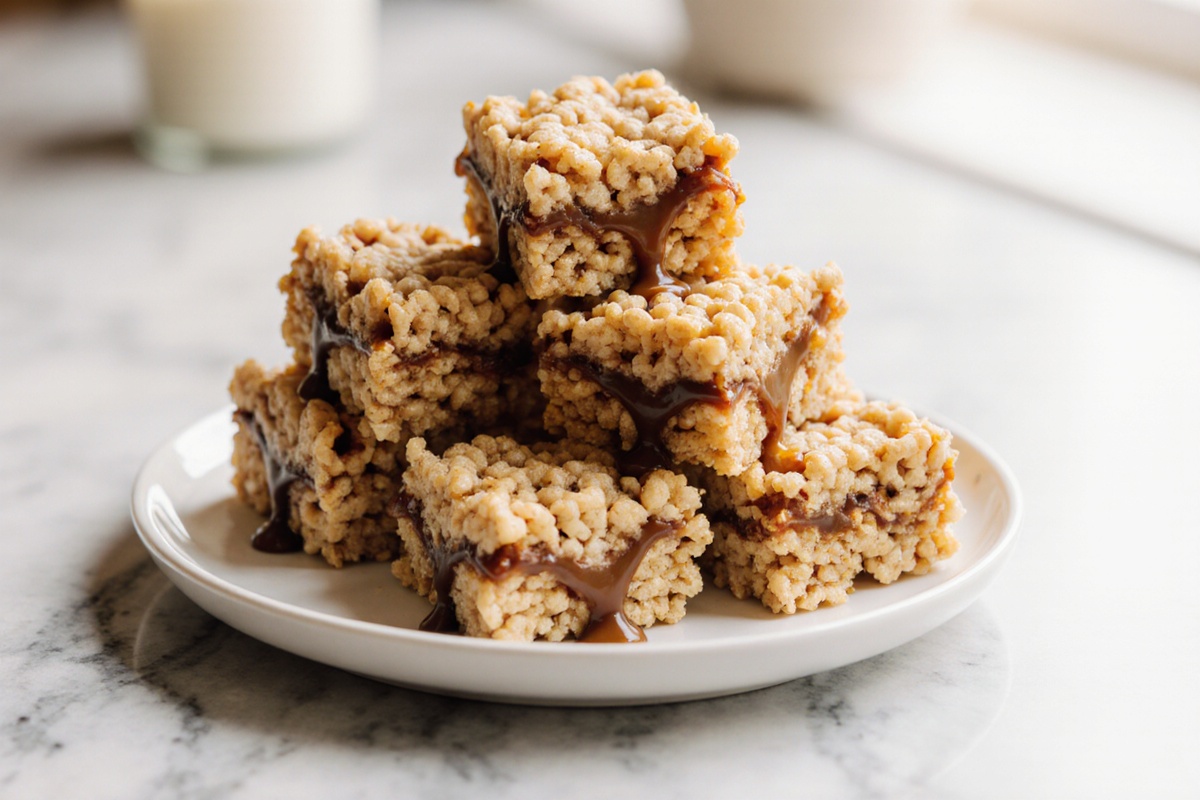
Brown Butter Dulce de Leche Rice Krispie Treats
Equipment
- Heavy-bottomed pan
- Spatula
- Heatproof bowl
- Prepared pan for setting
Ingredients
Ingredients
- 115 g Unsalted butter for browning
- 250 g Mini marshmallows
- 200 g Crisped rice cereal such as Rice Krispies
- 200 g Dulce de leche warmed for easier mixing
- 1 g Salt a pinch
- 5 ml Vanilla extract optional
Instructions
- Melt the butter gently in a heavy-bottomed pan, swirling it until it cooks evenly. Pay attention to the color and aroma to achieve perfectly browned butter.
- Add the mini marshmallows to the warm brown butter, stirring until melted and smooth.
- Gently fold in the crisped rice cereal until evenly coated. If using, fold in the vanilla extract.
- Drizzle in the warm dulce de leche and gently fold to create marbled swirls.
- Spread the mixture evenly into a prepared pan, pressing down firmly with a greased spatula.
- Let the pan rest at room temperature, then refrigerate until fully set before cutting into squares.
Notes
What Makes These Brown Butter Dulce de Leche Rive Krispie Treats Special
The Big Flavor of Browned Butter
Browned butter adds a delicious toffee-like, nutty flavor that regular melted butter just can’t match. This step really lifts the rice cereal base, giving every bite a warm, caramel touch. Trust me, this flavor moment makes the treat something you’ll remember. I’ve burned a batch or two in my early days, so I know precisely when to take it off the heat: when it turns a rich amber color and smells like toasted nuts.
To get it right, melt the butter slowly over medium heat and swirl the pan to ensure it cooks evenly. As it foams, keep an eye out for a light brown color and a fragrant, toasty scent. If it begins to darken too much or smells burnt, remove the pan from heat immediately and let it cool briefly before moving forward.
If you maintain steady heat and pay attention, browned butter adds depths of flavor that linger well after the last bite. It’s a small step that turns a simple treat into something you’ll find yourself craving over and over.
What Dulce de Leche Adds
Dulce de leche contributes a creamy caramel sweetness that flows through the mix, providing a luxurious contrast to the crispy cereal. It’s not just a drizzle—it’s a flavorful ribbon that ties the whole bar together. When warmed slightly, it pours easily, allowing you to weave it into the base or layer it in the middle for beautiful marbling.
The silky texture of dulce de leche pairs wonderfully with the toasted notes from browned butter. It helps soften the chewiness of the marshmallows a bit, resulting in a velvety bite without becoming too soft. If you’re new to this ingredient, warm it just enough to make it easier to mix in, but don’t overheat it to avoid it separating.
Using dulce de leche in these Rice Krispie Treats makes the dessert feel more indulgent while still being easy for home cooks. It’s the sweetness that party guests notice first, followed by the irresistible aroma of browned butter.
How This Differs from Classic Treats
Classic Rice Krispie Treats rely on marshmallows for sweetness and a straightforward butter flavor. In this version, the blend of browned butter and dulce de leche creates a richer and more intricate flavor profile with caramel and nutty notes. The texture remains wonderfully chewy with a satisfying snap, but the flavor depth is noticeably fuller and just a bit more luxurious.
The cereal’s crispiness takes center stage, while the dulce de leche adds creamy ribbons that melt into every bite. This treat isn’t all about chocolate or candy; it’s a refined upgrade that keeps the familiar comfort while giving it a sophisticated twist. If you love the original, you can switch back to classic marshmallows and plain butter, but you’ll probably notice how the toasty, caramel-heavy flavor shines through with this version.
Ingredients You’ll Need
Core Ingredients You Need
The foundation of these treats is made from simple, reliable pantry staples. Unsalted butter gives that browned, nutty richness, while mini marshmallows create the classic gooey binding. Rice Krispies or any crisped rice cereal keep the signature crunch that everyone loves. Dulce de leche adds the caramel creaminess that makes the whole bar pop. A pinch of salt balances the sweetness and brings out the flavors.
Optional ingredients to think about include a splash of vanilla for added warmth and a sprinkle of flaky sea salt on top for a finishing touch. Having these main items ready sets you up for success. Remember, quality ingredients at the start lead to great texture and flavor in the end.
Optional Add-Ins
If you’re feeling adventurous, several add-ins pair beautifully with this base. Chocolate chips folded into the warm mixture melt just enough to create pockets of cocoa goodness. Chopped toasted nuts bring a crunchy contrast and an inviting aroma. A light sprinkle of shredded coconut can add a tropical touch, while a few pretzel bits offer a salty kick that works well with dulce de leche.
For a kid-friendly version, stick to the core ingredients with a few chocolate chips or a drizzle of dulce de leche on top after setting. If you want a more adult twist, try finely chopped toasted almonds or pistachios for a fragrant crunch. The layering approach in this recipe makes it simple to include or omit add-ins without messing with the texture.
Ingredient Sourcing Tips
Look for unsalted butter that’s meant for baking to ensure consistent salinity. Standard mini marshmallows melt evenly and give a soft, cohesive bite. When you’re picking out Rice Krispies or crisped rice cereals, go for a brand with a clean ingredient list and no artificial additives if you want a bright flavor. You can find dulce de leche in jars or cans; pick a smooth, pourable variety simply marked as dulce de leche or Mexican caramel. If you’re avoiding dairy, there are plant-based dulce de leche options, but they might change the texture a bit.
If you’re unsure about ingredient freshness, check the jar or can for a clean seal and a pleasant aroma. Store cereals in a cool, dry spot and refrigerate dulce de leche after opening if you won’t use it quickly to maintain consistency and flavor.
Step-by-Step Preparation Guide
Browning the Butter to Perfection
Melt the butter gently in a heavy-bottomed pan, using a spatula to keep it moving so it cooks evenly. When it starts to foam, pay close attention to a light mahogany color and the unmistakable toasty aroma—this signals that the butter has browned. As soon as you get that rich, nutty smell and amber hue, take the pan off the heat to stop the cooking.
If you see dark specks or smell burnt butter, that’s your clue that you’ve gone too far. If that happens, pour the butter into a separate bowl to cool slightly and prevent further browning in the hot pan. Browning butter requires patience and steady heat to achieve depth without burning.
Once it’s browned, skim off any foam and pour the butter into a heatproof bowl. Let it cool just enough so it’s not too hot when you mix it with marshmallows. This step is definitely worth a moment’s pause—you’ll be grateful when the base sets with a glossy, even color.
Creating the Base Mixture
Start by adding the marshmallows to the warm brown butter, stirring gently until they melt into a smooth, glossy mixture. The goal is to create a cohesive bind that’s silky enough to coat the cereal without turning soupy. If you’re using a bit of vanilla, fold it in at this stage to evenly distribute the aroma.
Gradually fold in the crisped rice cereal with a spatula, mixing gently rather than stirring hard. You want even coverage so every bite offers that classic crunch along with the luscious binder. Once the base is uniformly coated and slightly glossy, it’s time to incorporate the dulce de leche.
You can drizzle warm dulce de leche in ribbons across the mixture and then use a gentle fold to create marbled swirls. This swirl not only looks good but also adds delightfully caramel pockets throughout the bars. If you want a stronger caramel flavor, save some to drizzle on top after pressing it into the pan.
Layering for Rich Texture
Spread the base evenly into a prepared pan, pressing down firmly with a greased spatula or clean hands. A flat, even layer will ensure clean, uniform slices and a consistent chew. If you aim for a layered look, drizzle a thin line of dulce de leche in the center before topping it with a second, lightly pressed layer of the cereal mixture.
For a nice contrast, you can sprinkle a fine dusting of flaky salt over the surface before it cools. The salt enhances the sweetness and highlights the toasty notes from browned butter. Use a gentle touch to avoid squashing the top layer too much; a light press is enough to set it.
Setting and Cooling
Let the pan rest at room temperature for a bit to start firming up, then refrigerate until completely set. The cold helps the bars slice cleanly and hold together when cut. Once set, grab a sharp knife to cut into squares or rectangles, wiping the blade between cuts for neat edges.
If you’re in a hurry, you can speed up the setting by placing the pan in the freezer for a short time. Just be careful not to freeze it for too long, or you might end up with a brittle texture instead of the chewy goodness you want. For the best results, let the bars come close to room temperature before serving to get the most flavor.
Pro Tips for Success
Common Mistakes to Avoid
One common mistake is overheating and burning the butter, which gives a bitter taste. Keep the heat steady and remove it from heat as soon as you smell that nutty fragrance. Another pitfall is not pressing the mixture firmly enough into the pan; loose bars will fall apart. Use light, even pressure to create a solid, uniform sheet.
Overmixing the base can also reduce chewiness. Gently fold the cereal with the melted binder until it’s evenly coated, then stop. If the dulce de leche is too cold, it might resist mixing in; warm it slightly to make it pourable before swirling it into the mix. Lastly, skipping the cooling step can lead to edges that smear or separate when you cut them.
Texture and Flavor Enhancement
For a deeper caramel flavor, increase the amount of dulce de leche slightly or add a final thin layer on top after the bars have set. A tiny pinch of flaky salt added before it firms up can really elevate the flavor contrast. If you prefer a softer bite, don’t press down too hard when smoothing the base into the pan.
If you want extra chew, you might consider adding a little coconut or a handful of chopped nuts into the base. For a smoother finish, you can leave out the marshmallows altogether and use a thicker binder, but you will lose that classic texture you expect in Rice Krispie Treats.
Cutting and Storage Advice
Store the finished bars in an airtight container to keep them chewy and prevent them from going stale. If you’re stacking them, place parchment between layers to avoid sticking. For short-term storage, keep them at room temperature away from direct heat or sunlight; for longer-term storage, refrigerate or freeze them, well-wrapped, to preserve texture and flavor.
Signs of freshness include a glossy surface, balanced sweetness, and a nice, stable bite. If you see dryness or crumbling, you may need a touch more dulce de leche or a light rewarm before serving to restore moisture.
Variations to Try
Flavor Modifications
Consider swapping in different caramel-like spreads instead of dulce de leche—caramel sauce or a light maple drizzle can offer similar sweetness with a bit of a different taste. For a chocolate-infused version, fold in dark chocolate chips or drizzle melted chocolate over the top after setting. If you want a citrusy twist, add a hint of orange zest to the base for a bright finish that contrasts well with the caramel notes.
If you’re after a more intense nutty flavor, try using browned butter with finely chopped toasted almonds or pecans folded into the mix. Mixing in a pinch of espresso powder with the dulce de leche can give you a mocha twist that appeals to kids and adults alike.
Regional Twists
Instead of Rice Krispies, try a local crisped rice cereal to give it a regional flair. You might also swap dulce de leche for a local caramel paste, which could bring different sweetness levels and textures into play. For a tropical vibe, sprinkle toasted coconut and macadamia nuts in the base.
If you’re interested in a sweet and savory balance, add a thin layer of peanut butter between two cereal layers for a Reese’s-style treat. Always keep the balance of salt and sweetness in mind to make sure the flavors work together.
Topping Options
Top your bars with a light dusting of sea salt, a drizzle of dulce de leche, or a thin layer of melted chocolate. Crushed pretzels add a crunchy salt punch that pairs beautifully with the caramel. For a shiny finish, brush the top with a tiny amount of warm dulce de leche or a glaze made from lightly sweetened condensed milk.
You can also press a few whole nuts on top for visual appeal and a burst of aroma. Whatever toppings you decide on, keep them light to ensure they don’t overpower the balance of browned butter, dulce de leche, and cereal.
FAQ – Brown Butter Dulce de Leche Rive Krispie Treats
Storage and Shelf Life
These treats stay best when stored in an airtight container at room temperature for several days, away from heat and moisture. If you need to keep them longer, refrigerate them to maintain chewiness, and bring them back to room temperature before serving for best texture and aroma. Frozen versions can last longer, but texture may shift slightly after thawing.
Substitutions
If you’re avoiding dairy, look for dairy-free dulce de leche or make a dairy-free caramel alternative, understanding it may affect texture and flavor. For a different butter profile, you can use ghee, which adds a slightly different nutty note. If you don’t have Rice Krispies, any crisped rice cereal with a similar texture will work, though the bite may vary slightly.
Troubleshooting Common Issues
If the bars feel too dry, try warming a little dulce de leche and drizzling it over the set bars to restore moisture and shine. If they’re too sticky, chill them a bit longer or press the surface a little firmer when setting. For a weak caramel presence, increase the drizzle or swirl level in the base during preparation. If the mixture doesn’t bind well, check that you’ve melted the marshmallows fully with the browned butter before adding cereal.
Conclusion
These Brown Butter Dulce de Leche Rive Krispie Treats are a hit every time! The golden color and inviting aroma will have your friends and family flocking to the kitchen. Each bite is a crispy, chewy blend of toasty flavors with a creamy, sweet ribbon running through. Give it a try – you might be surprised how simple and satisfying this recipe can be on a busy weeknight.