
Fried Strawberry Cheesecake Sandwiches used to be one of those treats I avoided because they seemed too fancy for a weeknight. But after some practice, I’ve figured out a straightforward method that brings all the joy without the fuss. The filling is creamy, the strawberries are bursting with flavor, and the fried exterior adds an irresistible crunch. You won’t believe how easy this is! This recipe streamlines the process so you can whip up these delightful sandwiches quickly, with minimal cleanup and maximum flavor. Get ready to impress yourself and your loved ones with this delicious addition to your dessert rotation.

Recipe Card – Fried Strawberry Cheesecake Sandwiches
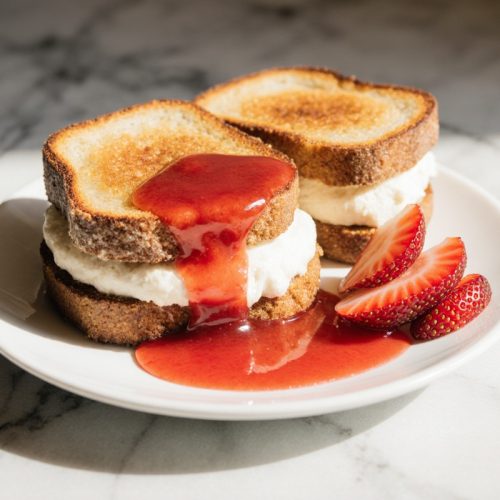
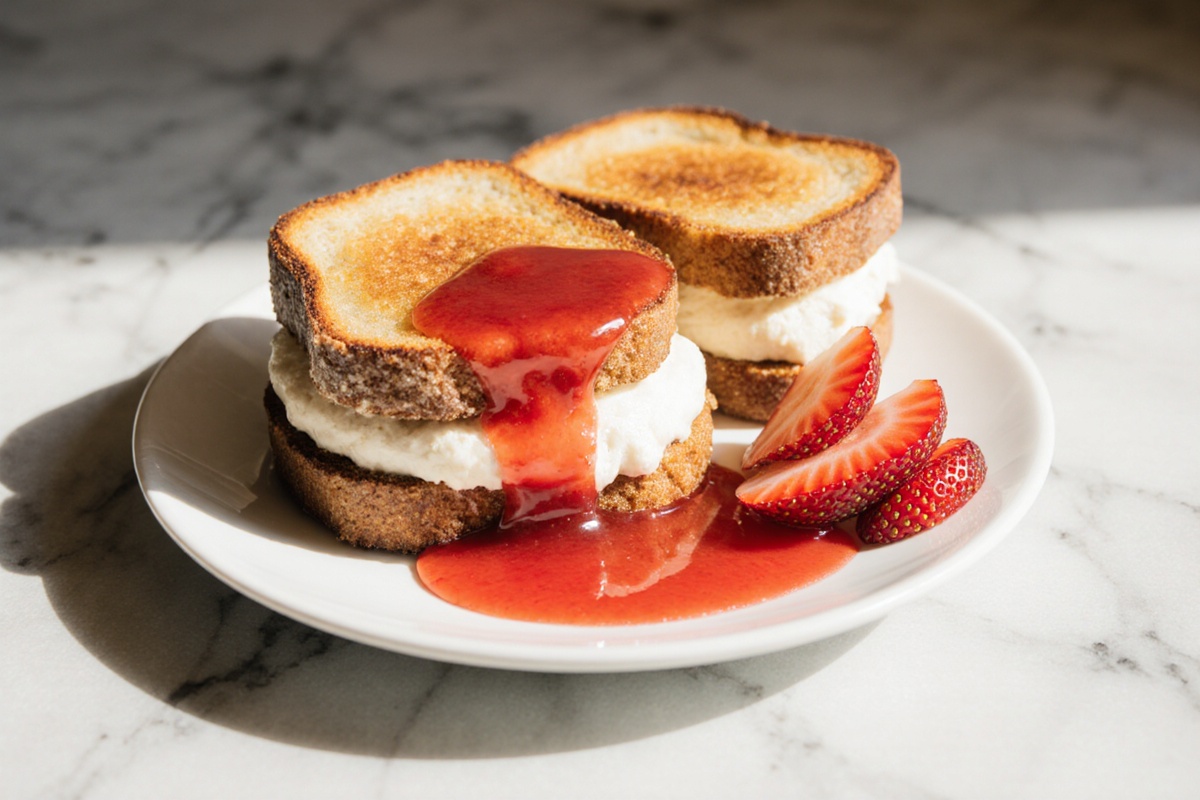
Fried Strawberry Cheesecake Sandwiches
Equipment
- Mixing Bowl
- Frying pan
- Whisk
- Spatula
- Paper towels
Ingredients
Ingredients
- 250 g Cream cheese
- 60 g Granulated sugar
- 5 ml Vanilla extract approximately 1 tsp
- 200 g Fresh strawberries or sliced strawberries
- 8 White sandwich bread slices
- 1 Egg
- 120 g All-purpose flour
- 150 ml Milk
- Neutral oil for frying
- Powdered sugar for dusting, optional
Instructions
- Start by beating the cream cheese with granulated sugar and vanilla extract until smooth. Fold in finely chopped strawberries or strawberry compote, then chill for about 15 minutes.
- Whisk together flour, salt, milk, and a beaten egg until smooth. Spread filling between two slices of bread and seal. Heat oil to 180°C (350°F) and dip the sandwich in batter. Fry for 2–3 minutes per side until golden and crisp.
- Place fried sandwiches on paper towels and dust with powdered sugar if desired. Serve warm for the best taste!
Notes
What Are Fried Strawberry Cheesecake Sandwiches?
Origin and Popularity
Fried strawberry cheesecake sandwiches are a fun treat that combines a creamy, tangy cheesecake filling with sweet, juicy strawberries and a crispy outside. Imagine a melt-in-your-mouth filling nestled between two slices of soft bread, then fried until it’s golden and crisp. I’ve found that home cooks really enjoy how easy it is to personalize this recipe based on what’s available, resulting in a cozy dessert that pleases a crowd.
This tasty sandwich has become popular because it looks great and is quick to put together. The combination of creamy filling and crunchy crust feels special, yet it uses familiar ingredients that most of us already have at home. It’s the kind of treat that photographs beautifully but can be made easily with practical steps you’ll want to repeat anytime.
Why They’re Trending on TikTok
TikTok creators love showcasing the sizzling sounds and the moment the filling bursts with creamy goodness. Quick clips highlight the batter turning a lovely golden color, the steam rising, and a sprinkle of powdered sugar that makes this dish stand out on screen. The trend focuses on comfort and indulgence, offering a special treat without being overly complicated.
The platform is also buzzing with variations: different fillings, assorted fruit toppings, or unique dipping sauces to keep things fresh. For home cooks, this trend offers a nudge to experiment with something rich yet approachable, and the quick and easy steps make it simple to share your own personalized version with friends and followers.
Ingredients and Nutrition Breakdown
Full Shopping List
This basic shopping list covers about 4 sandwiches.
- Cream cheese, 250 g;
- Granulated sugar, 60 g;
- Vanilla extract, 1 tsp;
- Fresh strawberries, 200 g (or sliced strawberries);
- White sandwich bread, 8 slices;
- Eggs, 1;
- All-purpose flour, 120 g;
- Milk, 150 ml;
- Neutral oil for frying (enough for shallow frying);
- Powdered sugar for dusting (optional).
If you want a brighter filling, think about adding lemon juice or a pinch of salt for a nice contrast.
You can make this lighter by swapping in light cream cheese and gluten-free bread if that’s your preference. For vegan versions, look for plant-based cream cheese and milk to keep the filling smooth and sweet. Just make sure to select fresh bread that’s sturdy enough to hold the filling without falling apart.
Calories and Macros Table
Calories per serving: approximately 420 kcal. Fat: around 26 g; Carbohydrates: about 28 g; Protein: roughly 7 g. These values will vary based on different bread types, the sweetness of your filling, and whether you choose to add that dusting of sugar. To get the best accuracy, weigh your ingredients and calculate based on the brands you use.
Step-by-Step Recipe
Prep the Filling
Start by beating 250 g of cream cheese with 60 g of granulated sugar and 1 tsp of vanilla extract until it’s nice and smooth. Next, fold in finely chopped fresh strawberries or even a strawberry compote to boost the color and fruity flavor. Chill the mixture for about 15 minutes to firm it up a bit, which helps prevent it from oozing out when you fry the sandwich. Trust me, this little step can make a world of difference in having neat slices.
While prepping, think about adding a splash of lemon juice if your strawberries aren’t very tart. This simple tweak can help balance the sweetness with a bit of zing. If your filling seems too soft after mixing, a quick chill will help firm it up for easier assembly.
Batter and Fry
For the batter, whisk together 120 g of flour, a pinch of salt, 150 ml of milk, and 1 beaten egg until smooth. To make each sandwich, spread filling between two slices of bread and press down gently to seal. Heat oil to 180°C (350°F). Dip the assembled sandwich into the batter, letting the excess drip off, and then fry for about 2–3 minutes per side until the crust is golden and crisp. Place them on a paper towel-lined plate and dust with powdered sugar if you’d like.
Here’s a quick safety tip: maintain the oil temperature. If it gets too cool, the crust will soak up more oil and become soggy. If it’s too hot, the outside will burn before the filling is heated through. A quick thermometer check helps you achieve that ideal color and texture.
Serving Suggestions
Enjoy these warm, with a scoop of vanilla ice cream or some berry coulis for an extra fruity touch. A simple side salad or a mint leaf garnish can balance out the richness nicely. They pair perfectly with a cup of coffee or tea for a well-rounded, comforting experience.
If you want to add some texture, serve a small bowl of sliced strawberries on the side for dipping. For a fun dessert platter, cut the cooked sandwiches in half diagonally and arrange them with berries and a sprinkle of powdered sugar.
Tips, Tricks, and Common Mistakes
Achieving Perfect Crisp
Keep the oil at a steady 180°C (350°F). If you crowd the pan, the oil temperature drops, and you’ll end up with a soggy crust. Work in batches and pat the sandwiches dry before battering to reduce moisture that can make the crust weak. If the crust isn’t crisp after the first flip, give it an extra minute and ensure the heat stays steady.
A light, even coating is essential. If the batter starts clumping, whisk it briefly again and continue frying. If the exterior seems to brown too quickly, lower the heat just a bit and let the inside cook more slowly. The perfect outcome is a crispy crust with a creamy center.
Make-Ahead Hacks
You can prepare the filling up to 24 hours in advance. Just keep it tightly covered in the fridge. Assemble the sandwiches just before frying to prevent the bread from getting soggy. If you want to save time later, you can freeze the assembled, unbattered sandwiches for up to a month; thaw them before battering and frying, then cook as directed.
From experience, I can tell you that chilling the assembled sandwiches briefly before battering helps keep that filling from leaking out during frying. This small step can make a significant difference in getting clean bites.
Delicious Variations and Pairings
Regional Twists
Try using berry compotes like blueberry or raspberry for a different flavor profile. You could mix in a layer of peach preserves with cinnamon-spiced cream cheese for a southern-inspired treat. Opt for brioche or challah bread for a richer, sweeter taste, or use gluten-free bread if you’re avoiding gluten.
If you’re in the mood for a tropical twist, add a thin layer of passion fruit jam or mango slices inside the filling. A pinch of cardamom or cinnamon can also bring a spiced flair without changing the core technique.
Vegan and Low-Cal Options
To keep things dairy-free, use vegan cream cheese and plant-based milk. Replace the bread with gluten-free options if needed, and consider a vegan egg substitute, or simply skip the egg in the batter, adding a bit more flour to maintain its thickness. Lighten up the dusting of powdered sugar or leave it out completely to cut calories.
For a lighter fried option, switch to a thinner batter or try air-frying instead of deep-frying (check the air fryer section for details). These tweaks can significantly reduce calories while still giving you that satisfying texture.
FAQ – Fried Strawberry Cheesecake Sandwiches
Can I Use an Air Fryer?
Yes. Preheat the air fryer to about 190°C (375°F). Lightly spray the battered sandwiches with oil, then air-fry for 6–8 minutes, flipping halfway through. The result is a crisp crust with less oil than traditional frying. Expect a slightly lighter texture but great crunch and sweetness.
Are They Gluten-Free?
They can be, if you select gluten-free bread and a gluten-free batter mix (or use gluten-free flour). Be mindful of cross-contamination if you’re serving to celiac guests. The filling itself is naturally gluten-free if you avoid any add-ins containing gluten.
How Long Do They Last?
Best eaten fresh the day they’re fried. If you refrigerate leftovers, reheat in an oven or air fryer at 180°C (350°F) for 4–6 minutes to restore some crisp. Do not rely on them staying crisp after refrigeration for long periods.
Can I Bake Instead of Fry?
Yes. Bake on a parchment-lined sheet at 220°C (425°F) for 12–15 minutes, turning once halfway. This yields a crisper exterior with less oil, though the texture will differ from a fried crust. For a closer fried profile, finish under a hot broiler for 1–2 minutes.
How to Lower Calories?
Choose light cream cheese or use less sugar in the filling. Use a thinner batter or a smaller amount of batter to reduce added fats. Baking or air-frying instead of deep-frying also cuts oil. Pair with a side of fresh fruit to add volume without piling on more calories.
Conclusion
When it’s all said and done, Fried Strawberry Cheesecake Sandwiches are a feast for the eyes and the taste buds. Picture that golden, crispy exterior giving way to a creamy center dotted with juicy strawberries – it’s a treat both warm and inviting. The aroma of fried dough and sweet cream fills the kitchen, making it hard to resist going back for another bite. Trust me, if you give this simple recipe a try, you’ll find yourself adding it to your regular cooking lineup. So roll up those sleeves and bring a little sweetness to your day; you might just surprise yourself with how easy and delicious this can be!